CFUN
This is a Pytorch implementation of CFUN for whole heart segmentation. And it's also the source code for CFUN: Combining Faster R-CNN and U-net Network for Efficient Whole Heart Segmentation.
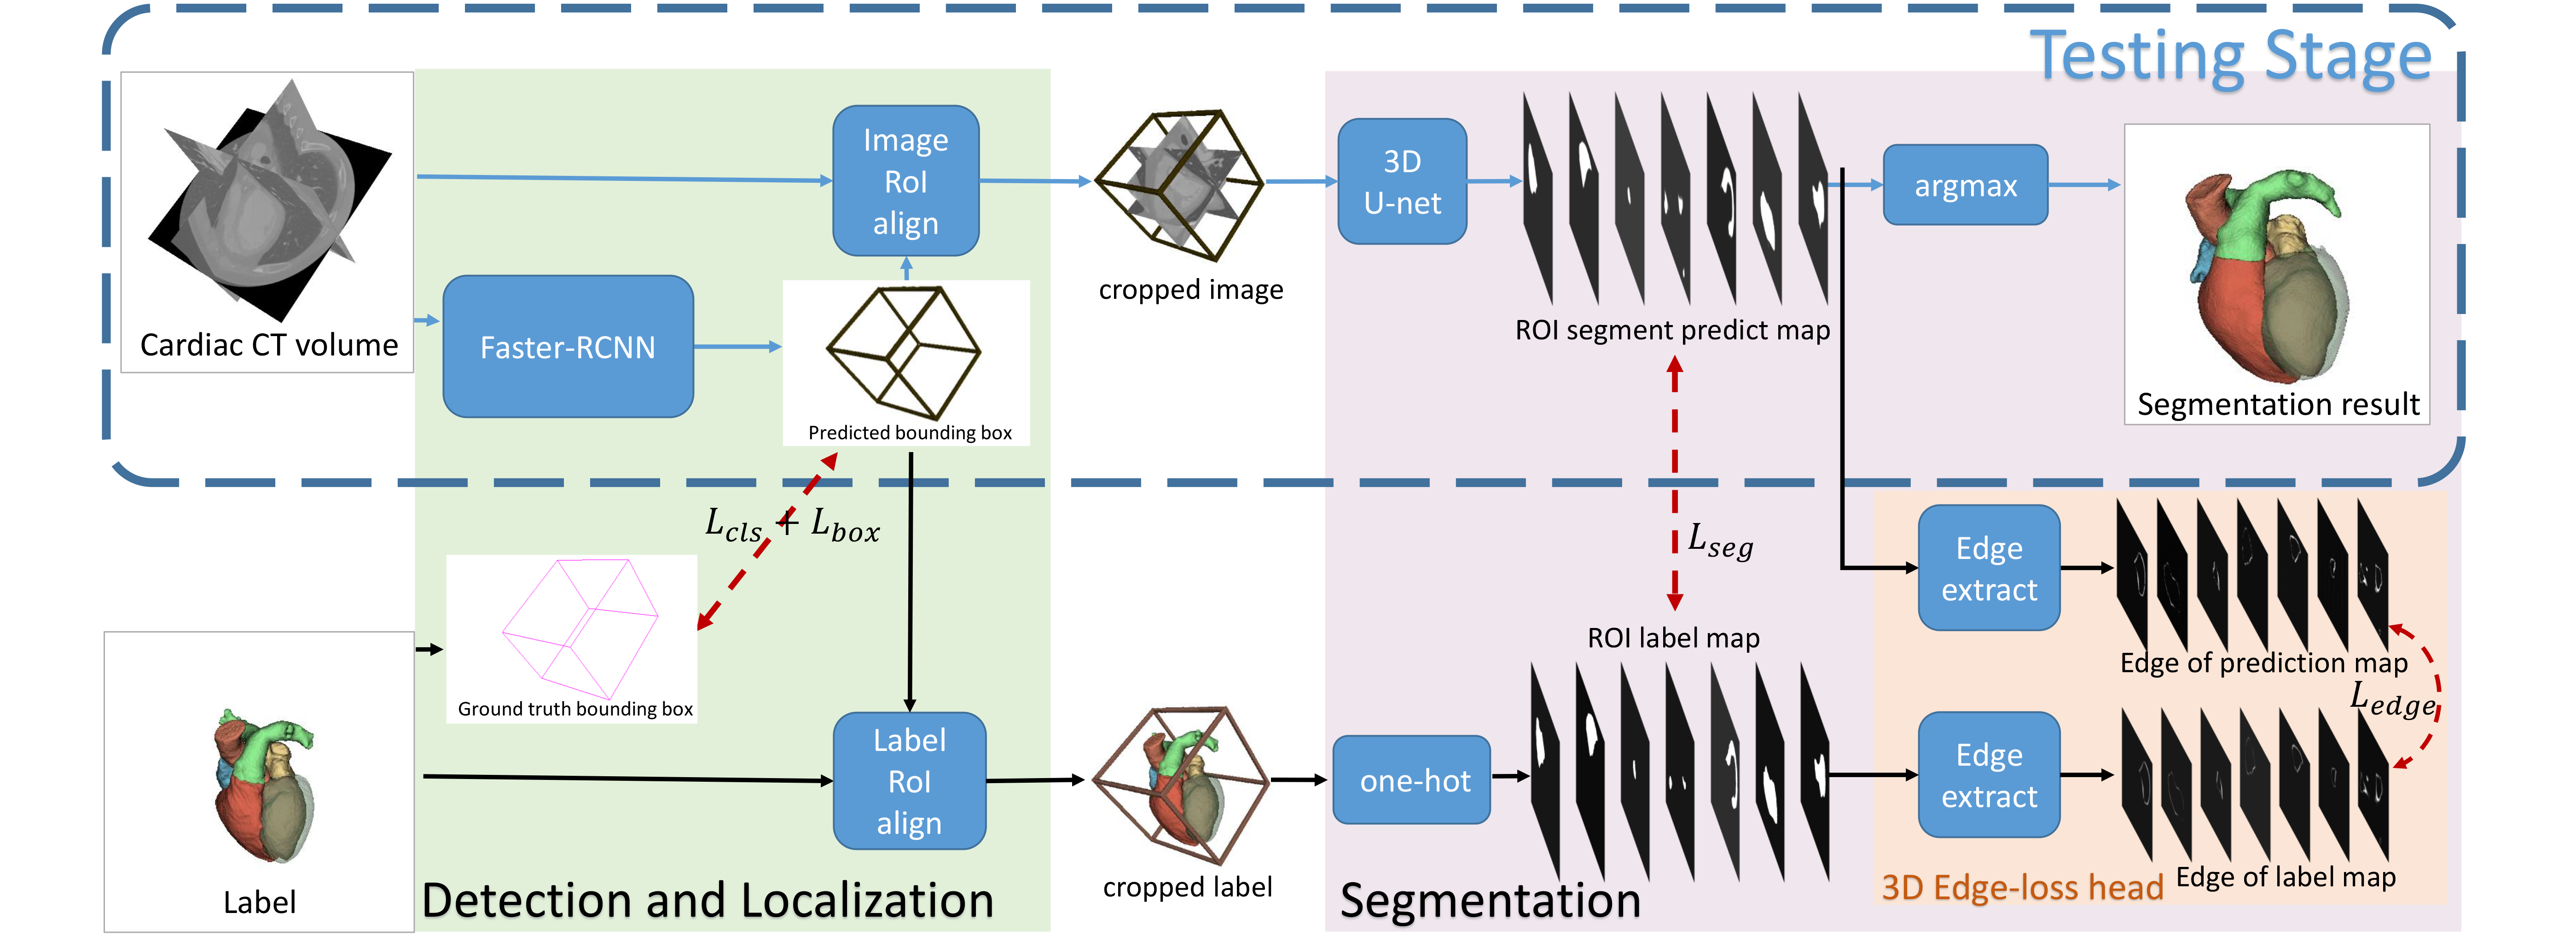
Due to Faster R-CNN's precise positioning ability and U-net's powerful segmentation ability, our elaborately designed pipeline which combines them together needs only one-step detection and segmentation inference to get the whole heart segmentation result, achieving excellent performances both in speed and precision. Besides, we adopt and design a new loss function based on edge information named 3D Edge_loss to accelerate the convergence and get a better segment result.
Architecture
Prerequisites
- Python 2.7+ or 3.5+
- Pytorch 0.4.1
- numpy, skimage, scipy and imgaug
Usage
The dataset we use for our experience is mainly based on the MM-WHS2017 Challenge, but you can apply it to whatever data you have.
However, if you want to apply our method to your own dataset, we have to remind you of the differences between CFUN and Mask-RCNN.
In our pipeline, the ground-truth bounding box is the whole heart organ rather than specific part of the heart, like the left ventricle blood cavity (LV), the myocardium of the left ventricle (Myo) or so, because they're all tightly connected together. Therefore, if the targets to segment in your dataset are seperated organs, then you may want to change the code in model.py's function load_image_gt to generate different organ-specific bounding boxes.
First, you need to prepare a dataset.json file which contains all the directions of the training and testing images and training labels.
Then, you can start training the model with:
$ python3 heart_main.py train --weights="none" --data="data_dir" --stage="beginning"
where data_dir is the directory where you place your dataset.json file.
After the loss of the first_stage training ('beginning' in our code) seems to go stably, you can run the finetuning stage with:
$ python3 heart_main.py train --weights="./logs/heart/weight_flie" --data="data_dir" --stage="finetune"
Or, you can test the performance of the model via:
$ python3 heart_main.py test --weights="./logs/heart/weight_flie" --data="data_dir" --stage="stage" --save=true --bbox=false --limit=20
where save=true means you want to save the detection result in the .nii.gz format and bbox=false means you don't want to draw the predicted bounding box. But if you want to test the detection performances at the same time, you can set it as true.
Besides, the number of limit is the images you want to test.
In the default code, testing images are also images with groung-truth so IoUs are calculated to present the result for accuracy.
If you want to test the model on non-label images, then you can modify the code in heart_main.py.
Results
Our method reaps an average of 85.9% Dice score on the test set. And it takes only less than 15 seconds to generate a segment result.
One prediction of our model can be seen as follows:
Example
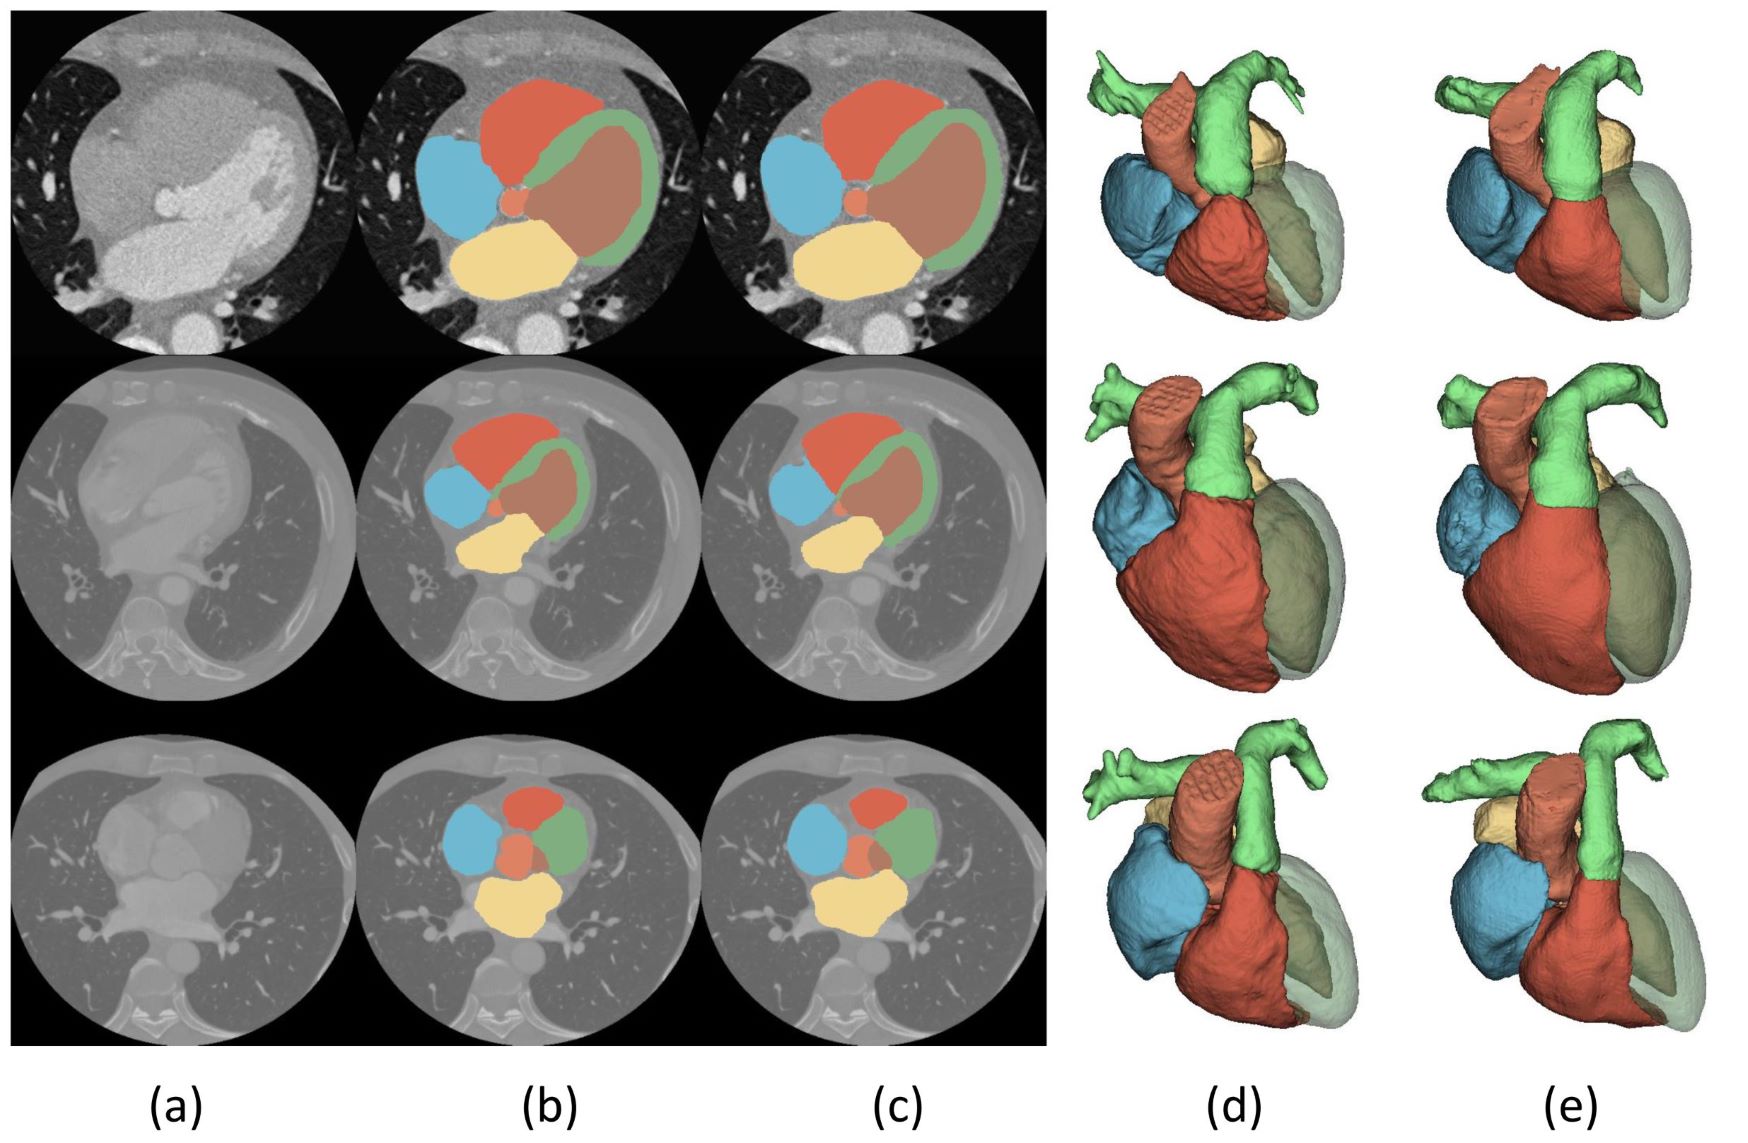
visualization of some test results. From top to bottom, the four CT images are 1007, 1009 and 1019, respectively.
(a) shows the original CT images, (b) shows ground truth and (c) shows the test result.


