MLComp
MLComp is a distributed DAG (Directed acyclic graph) framework for machine learning with UI.
The goal of MLComp is to provide tools for training, inferencing, creating complex pipelines (especially for computer vision) in a rapid, well manageable way.
MLComp is compatible with: Python 3.6+, Unix operation system.
Features
- Amazing UI
- Catalyst support
- Distributed training
- Supervisor that controls computational resources
- Synchronization of both code and data
- Resource monitoring
- Full functionality of the pause and continue on UI
- Auto control of the requirements
- Code dumping (with syntax highlight on UI)
- Kaggle integration
- Hierarchical logging
- Grid search
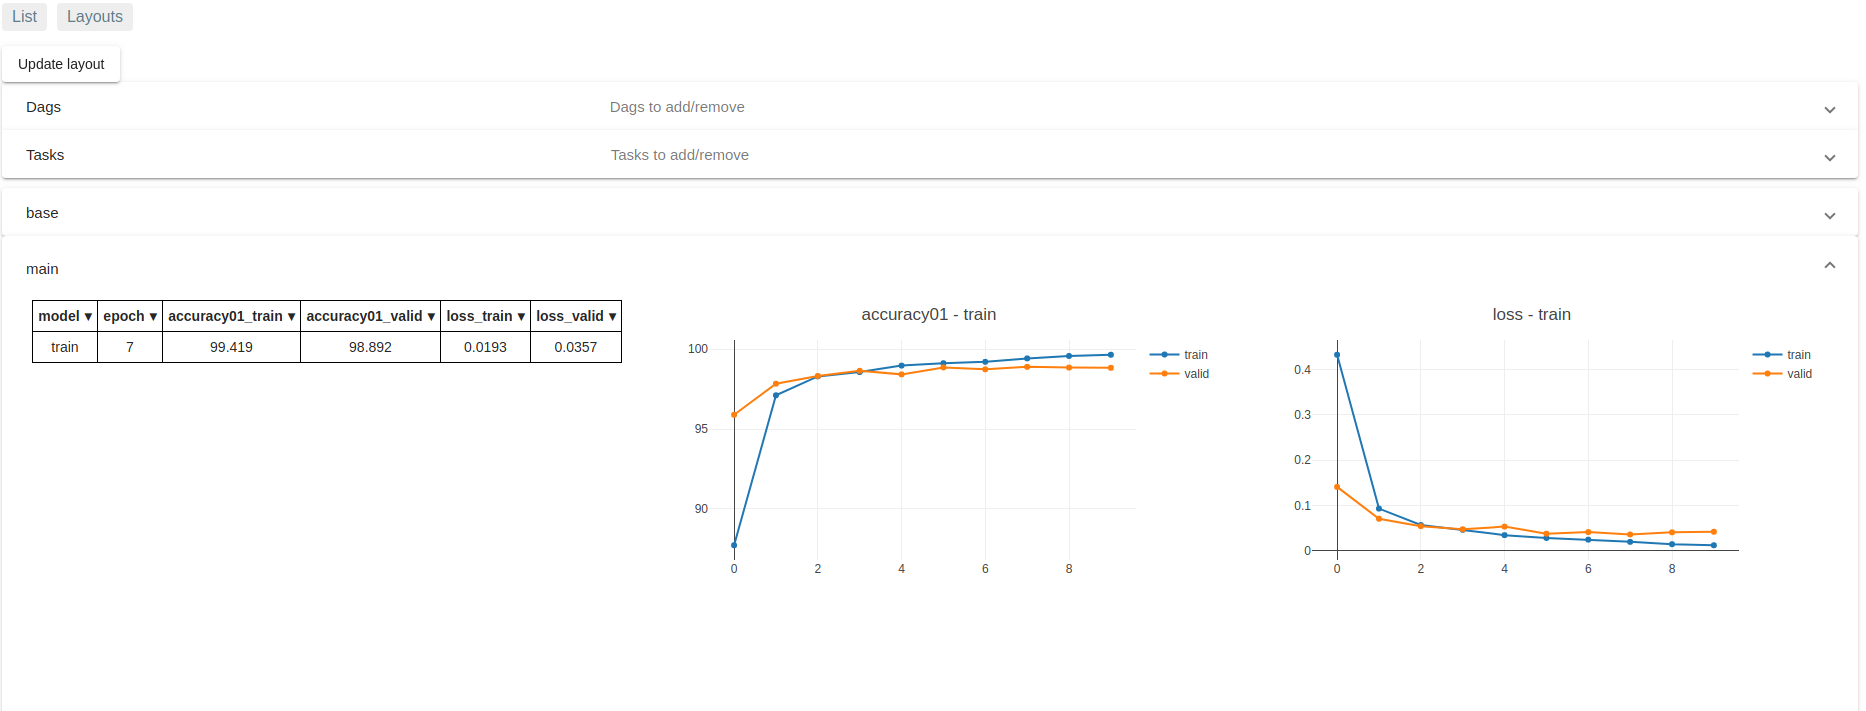
- Experiments comparison
- Customizing layouts
Screenshots
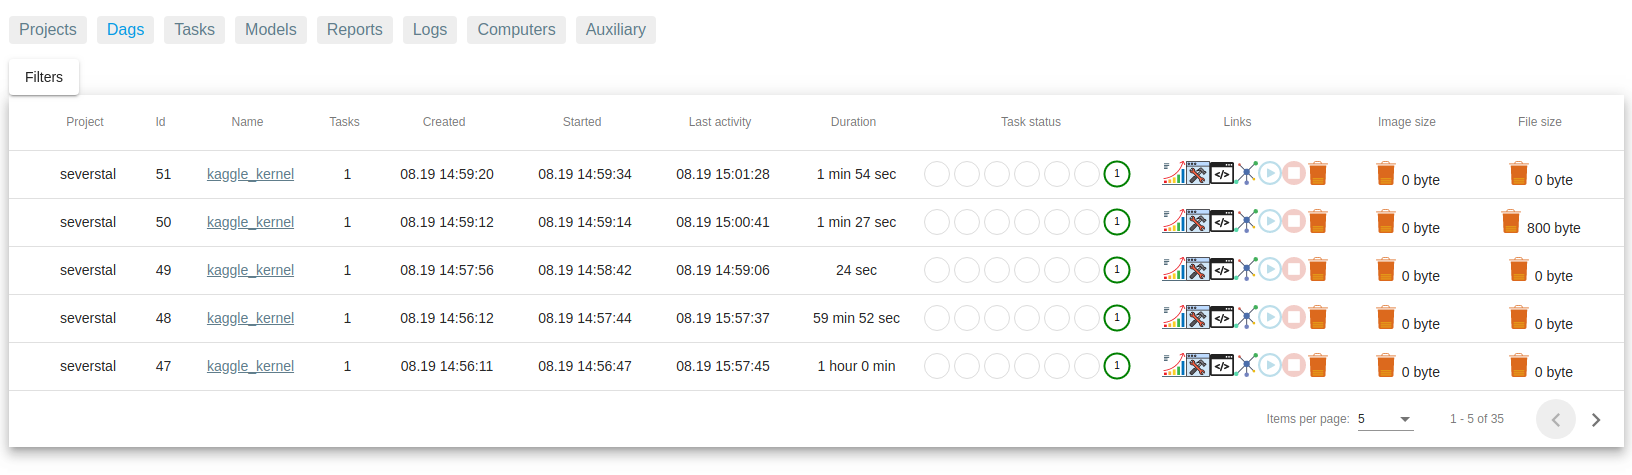
Dags
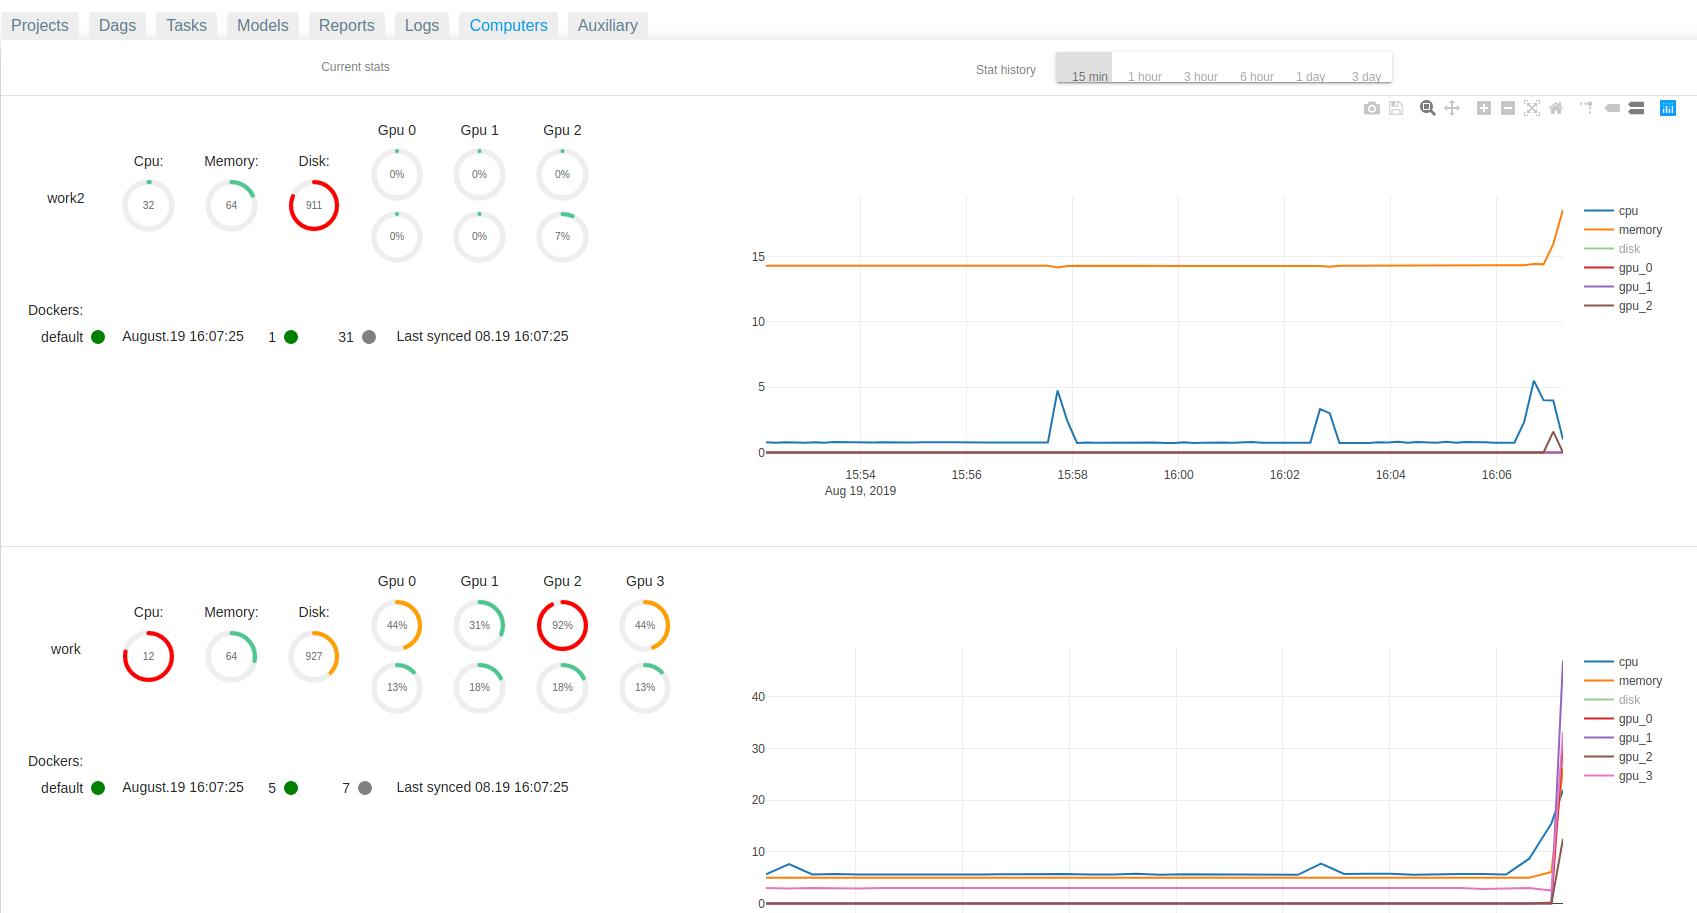
Computers
Reports
Code

Graph

Installation
-
Install MLComp package
pip install mlcomp mlcomp init -
Setup your environment. Please consider Environment variables section
-
Run db, redis, mlcomp-server, mlcomp-workers:
Variant 1: minimal (if you have 1 computer)
Run all necessary (mlcomp-server, mlcomp-workers, redis-server), it uses SQLITE:
mlcomp-server startVariant 2: full
a. Change your Environment variables to use PostgreSql
b. Install rsync on each work computer
sudo apt-get install rsyncEnsure that every computer is available by SSH protocol with IP/PORT you specified
in the Environment variables file.rsync will perform the following commands:
to upload
rsync -vhru -e "ssh -p {target.port} -o StrictHostKeyChecking=no" \
{folder}/ {target.user}@{target.ip}:{folder}/ --perms  --chmod=777
to download
rsync -vhru -e "ssh -p {source.port} -o StrictHostKeyChecking=no" \
{source.user}@{source.ip}:{folder}/ {folder}/ --perms  --chmod=777
c. Install apex for distributed learning
d. To Run postgresql, redis-server, mlcomp-server, execute on your server-computer:
cd ~/mlcomp/configs/
docker-compose -f server-compose.yml up -d
e. Run on each worker-computer:
mlcomp-worker start
UI
Web site is available at http://{WEB_HOST}:{WEB_PORT}
By default, it is http://localhost:4201
The front is built with AngularJS.
In case you desire to change it, please consider front's Readme page
Usage
Run
mlcomp dag PATH_TO_CONFIG.yml
This command copies files of the directory to the database.
Then, the server schedules the DAG considering free resources.
For more information, please consider Docs
Docs and examples
API documentation and an overview of the library can be
found here ![]()
You can find advanced tutorials and MLComp best practices in the examples folder of the repository.
Environment variables
The single file to setup your computer environment is located at ~/mlcomp/configs/.env
- ROOT_FOLDER - folder to save MLComp files: configs, db, tasks, etc.
- TOKEN - site security token. Please change it to any string
- DB_TYPE. Either SQLITE or POSTGRESQL
- POSTGRES_DB. PostgreSql db name
- POSTGRES_USER. PostgreSql user
- POSTGRES_PASSWORD. PostgreSql password
- POSTGRES_HOST. PostgreSql host
- PGDATA. PostgreSql db files location
- REDIS_HOST. Redis host
- REDIS_PORT. Redis port
- REDIS_PASSWORD. Redis password
- WEB_HOST. MLComp site host. 0.0.0.0 means it is available from everywhere
- WEB_PORT. MLComp site port
- CONSOLE_LOG_LEVEL. log level for output to the console
- DB_LOG_LEVEL. log level for output to the database
- IP. Ip of a work computer. The work computer must be accessible from other work computers by these IP/PORT
- PORT. Port of a work computer. The work computer must be accessible from other work computers by these IP/PORT (SSH protocol)
- MASTER_PORT_RANGE. distributed port range for a work computer. 29500-29510 means that if
this work computer is a master in a distributed learning, it will use the first free port
from this range. Ranges of different work computers must not overlap. - NCCL_SOCKET_IFNAME. NCCL network interface.
You can see your network interfaces withifconfigcommand.
Please consider nvidia doc


