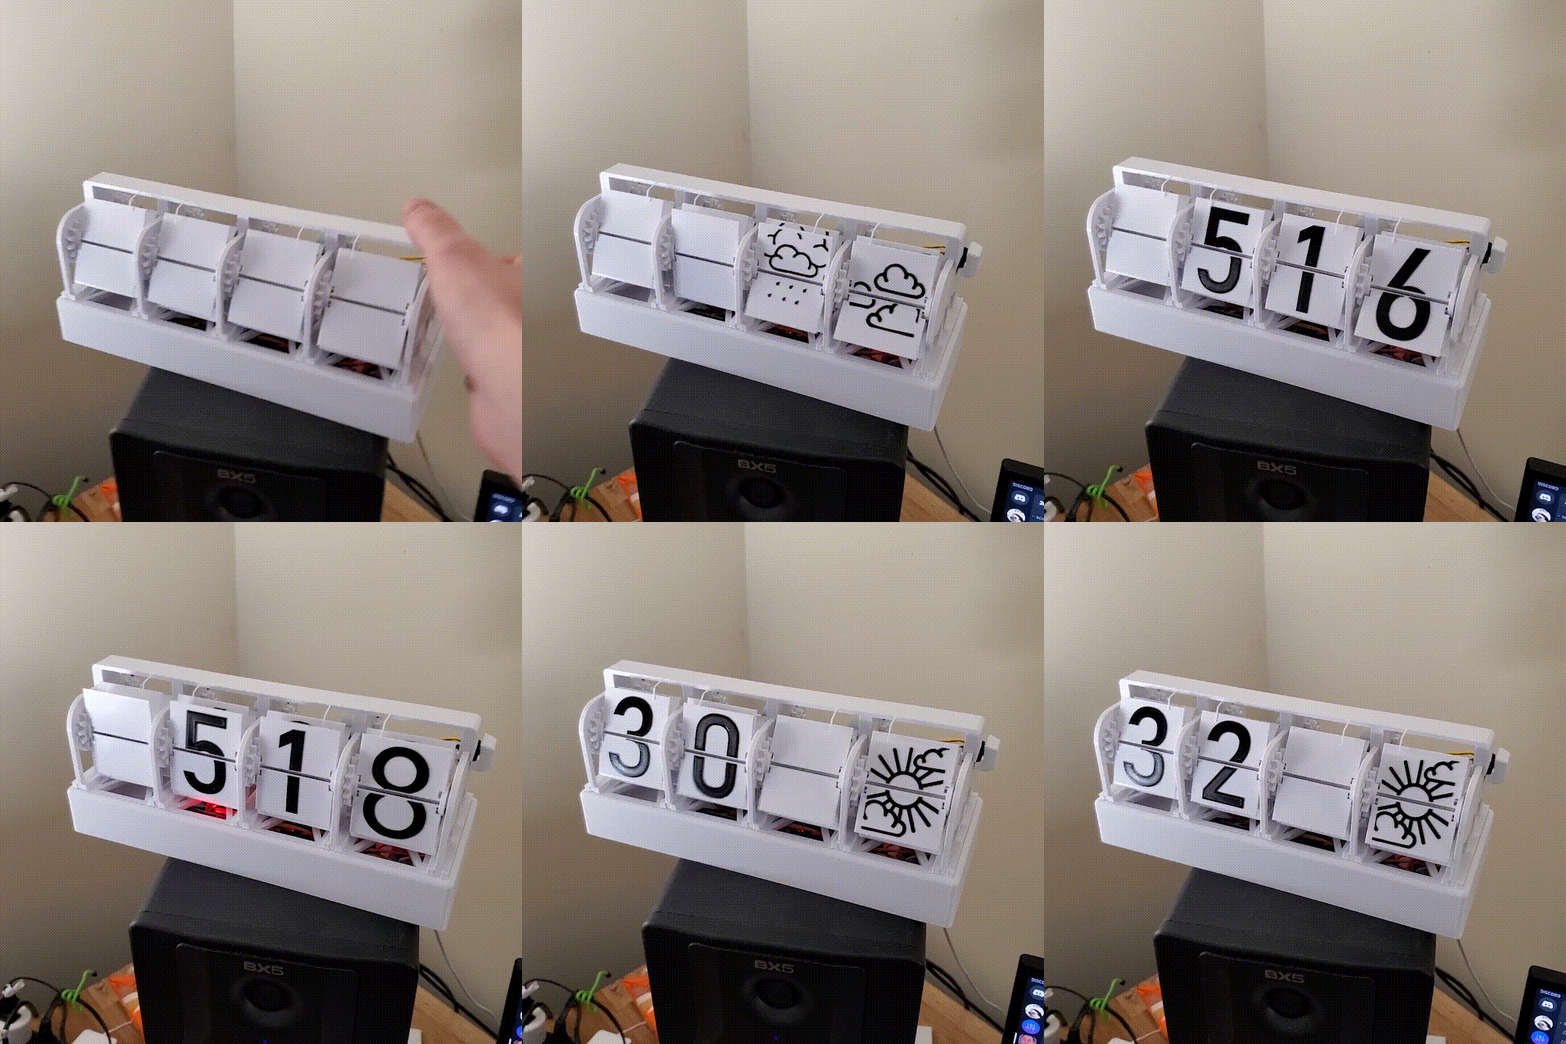
Smart Flip Clock
3D printed smart clock that puts a new twist on old technology.

Making The Smart Flip Clock
The first thing that must be done for this project is to obtain all the materials that will be used. The list of things needed in this project are:
- Raspberry Pi Zero W (or any raspberry pi)
- Adequate Power Supply for Pi
- Stepper Motors (linked below)
- 3D printer and filament
- Wire
- Ability to Solder
- Glue
- Mechanical key switch from a keyboard
This design uses 4 stepper motors that can be powered using a Raspberry Pi. An external power supply is better, however they will work fine without one. The motors that I used in this project are the 28byj-48 steppers. They can be powered using 5v.
They can be found on Amazon at this link. https://amzn.to/2RUPMWd
The entire construction of this clock is 3D printed, including the numbers and symbols on the flaps. Drawing on the flaps, or using stickers would be much easier however.
After printing the parts that are found on this GitHub, they can be assembled to fit together. The only thing that needs adjustment is the very small piece of plastic that is used to hold each flap in position. By design, this piece is meant to be bent after the fact to an amount that holds them sufficiently. Here's the correct number of parts that you'll need for the full assembly. If they are not listed, you only need 1 of them.
- 56 Flaps
- 4 Drive Plates
- 4 Top Rings (to hold each of the 14 flaps onto their central shaft)
- 4 Flap Gear shafts
- 4 Drive Gears
- 4 Idle Gears
- 4 Idle Gear Holders (look like washers)
- 8 Bolts (printed)
- 4 Frame braces (optional if you're using the flap restrictor)
For the larger parts, I've included 2 options for those who are trying to print this with a smaller print bed. Option 1 is to come up with something on your own, and use the STEP files that are in the STEP files folder. Option 2 is to use the parts labeled clock_part_split0.stl. These are cut up to fit onto beds that are 150mm, to make sure that everyone can print them.
In the code (and before putting labels on), make sure to test the code after plugging in the motors. If they do not rotate smoothly, you have likely ordered the pins incorrectly. Add a time.sleep(1) command where the clock increments each step of the motor. This will indicate what stage in the step that the motor is in. The LEDs on the controller board should light up to reflect its current stage. They should follow this order. 1 for on, 0 for off.
0: 1 0 0 0
1: 1 1 0 0
2: 0 1 0 0
3: 0 1 1 0
4: 0 0 1 0
5: 0 0 1 1
6: 0 0 0 1
7: 1 0 0 1
If this is not true, ensure that the correct pins are in order in the code.
After this holds true for all 4 steppers, then you are good to attack the motors to the clock frame with the plastic bolts and glue.
A button is also included, I used an old mechanical key switch that was laying around. This is used to operate the clock.
Make sure that the following packages are installed on the system, so that the code is able to locate itself and give accurate weather information. This is done with the following commands.
sudo pip3 install geocoder
For the Pi Zero, the following command must be run to obtain the GPIO package.
sudo apt-get update sudo apt-get install rpi.gpio
Before the code will run, you must first obtain an API key from https://openweathermap.org/api (free). This is needed to fetch the weather for your area. Take the key that is generated from your account, and put it in the place of api_key = "YOUR_API_KEY_HERE" in the code (line 122). This will give the python code access to the weather data.
Upload the code to the Pi, and run the command sudo nohup flipclock.py. This will get the code to run in the background on the pi.
There are 4 "modes" of the clock. Right as the script starts, it's in its default mode of showing the time. When the button is pressed, it will show the weather for an amount of time you can set for yourself, default is 10 seconds. To pause the clock, hold the button for more than 2 seconds but less than 10. To unpause, just press the button again. To set the flaps back to their 'resting' state, 0000, hold the button for 10 seconds. This will also end the python script.


