Draw This.
Draw This is a polaroid camera that draws cartoons. You point, and shoot - and out pops a cartoon; the camera's best interpretation of what it saw. The camera is a mash up of a neural network for object recognition, the google quickdraw dataset, a thermal printer, and a raspberry pi.
If you'd like to try it out for yourself, the good folks at Kapwing have created an online version!
The software can run both on a desktop environment (OSX, Linux) such as a laptop, or an embedded environment on a raspberry pi.
Desktop installation (only tested on OSX and linux)
- Requirements:
- Python 2.7*
- Cairo (on OSX
brew install cairo)
- install dependencies using
pip install -r requirements_desktop.txtfrom thecartoonifysubdirectory. - run app from command line using
python run.py. - select 'yes' when asked to download the cartoon dataset (~5GB) and tensorflow model (~100MB).
- close the app using ctrl-C once the downloads have finished.
- start the app again using
cartoonify. - you will be prompted to enter the filepath to an image for processing. Enter the absolute filepath surrounded by double quotes.
*Unfortunately python 2.7 is required because the correct python 3 wheels are not available for both the pi and desktop.
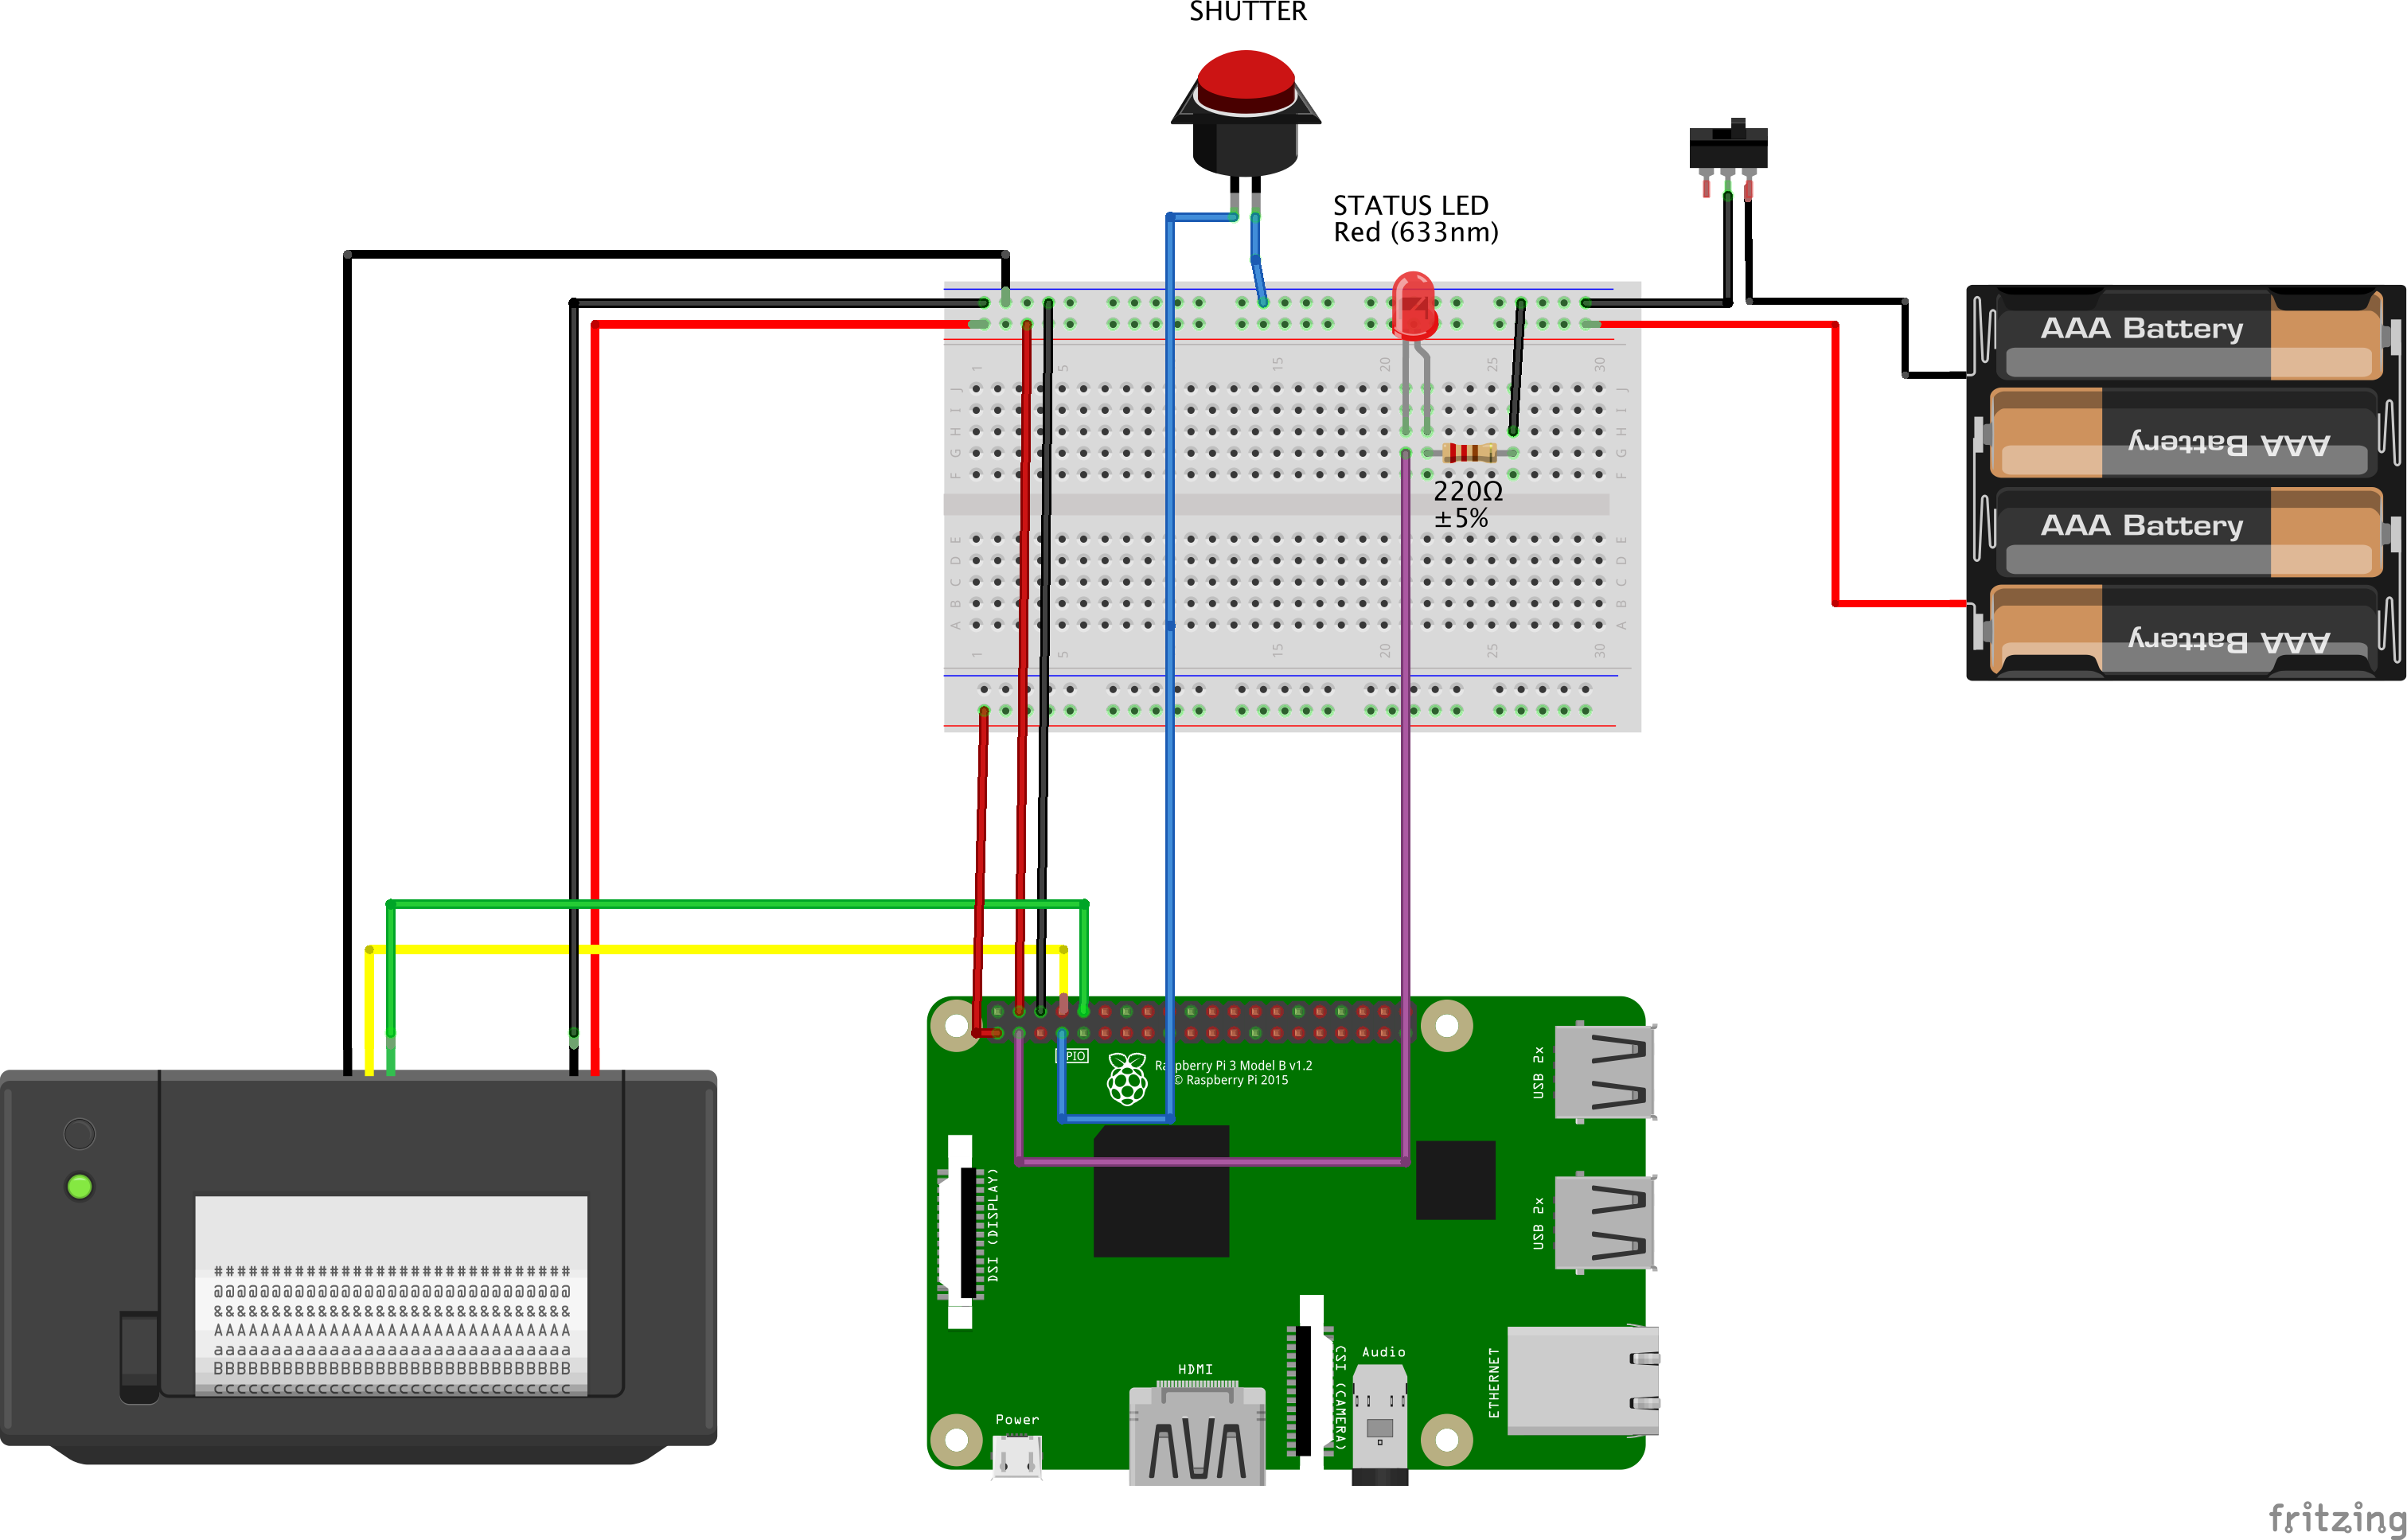
Raspberry pi wiring
The following wiring diagram will get you started with a shutter button and a status LED.
If the software is working correctly, the status LED should light up for 2-3 seconds when the shutter is pressed
while the raspi is processing an image. If the light stays on, something has gone wrong (most likely the camera is unplugged).
IMPORTANT NOTE the diagram below shows AA cells, however this is not correct. You must use eneloop cells to power the camera - these cells
deliver 1.2V each, as well as enough current to drive the raspi and thermal printer.
Raspberry pi installation
-
requirements:
- raspberry pi 3
- rasbian stretch image on 16gb SD card (8gb too small)
- internet access on the raspi
- pip + python
- raspi camera v2
- a button, led, 220 ohm resistor and breadboard
- (optional) Thermal printer to suit a raspi 3. I used this printer here.
Note you will need to use the printer TTL serial interface as per the wiring diagram above, rather than USB.
-
install docker on the raspi by running:
curl -sSL https://get.docker.com | sh -
set up and enable the raspi camera through
raspi-config -
clone the source code from this repo
-
run
./raspi-build.sh. This will download the google quickdraw dataset and tensorflow model,
then build the required docker image. -
run
./raspi-run.sh. This will start the docker image.
Troubleshooting
- Check the log files in the
cartoonify/logsfolder for any error messages. - The most common issue when running on a raspi is not having the camera plugged in correctly.
- If nothing is printing, check the logs then check whether images are being saved to
cartoonify/images. - Check that you can manually print something from the thermal printer from the command line.


