Mycodo
Mycodo is open source software for the Raspberry Pi that couples inputs and outputs in interesting ways to sense and manipulate the environment.
Install Mycodo
Prerequisites
- Raspberry Pi single-board computer (any version: Zero, 1, 2, 3, or 4)
- Raspberry Pi Operating System flashed to a micro SD card
- An active internet connection
Mycodo has been tested to work with Raspberry Pi OS Lite (2020-05-27), and also the Desktop version if using Mycodo version => 8.6.0.
Install
Once you have the Raspberry Pi booted into the Raspberry Pi OS with an internet connection, run the following command in a terminal to initiate the Mycodo install:
curl -L https://kizniche.github.io/Mycodo/install | bash
Install Notes
Make sure the install script finishes without errors. A log of the output will be created at ~/Mycodo/install/setup.log.
If the install is successful, the web user interface should be accessible by navigating a web browser to https://127.0.0.1/, replacing 127.0.0.1 with your Raspberry Pi's IP address. Upon your first visit, you will be prompted to create an admin user before being redirected to the login page. Once logged in, check that the time is correct at the top left of the page. Incorrect time can cause a number of issues with measurement storage and retrieval, among others. Also ensure the host name and version number at the top left of the page is green, indicating the daemon is running. Red indicates the daemon is inactive or unresponsive. Last, ensure any java-blocking plugins of your browser are disabled for all parts of the web interface to function properly.
If you receive an error during the install that you believe is preventing your system from operating, please create an issue with the install log attached. If you would first like to attempt to diagnose the issue yourself, see Diagnosing Issues.
A minimal set of anonymous usage statistics are collected to help improve development. No identifying information is saved from the information that is collected and it is only used to improve Mycodo. No other sources will have access to this information. The data collected is mainly what and how many features are used, and other similar information. The data that's collected can be viewed from the 'View collected statistics' link in the Settings -> General page. There is an opt out option on the General Settings page.
REST API
The latest API documentation can be found here: API Information and API Endpoint Documentation.
About PID Control
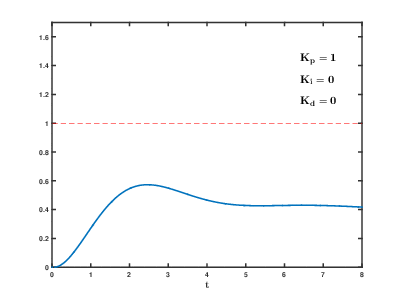
A proportional–integral–derivative (PID) controller is a control loop feedback mechanism used throughout industry for controlling systems. It efficiently brings a measurable condition, such as temperature, to a desired state (setpoint). A well-tuned PID controller can raise to a setpoint quickly, have minimal overshoot, and maintain the setpoint with little oscillation.
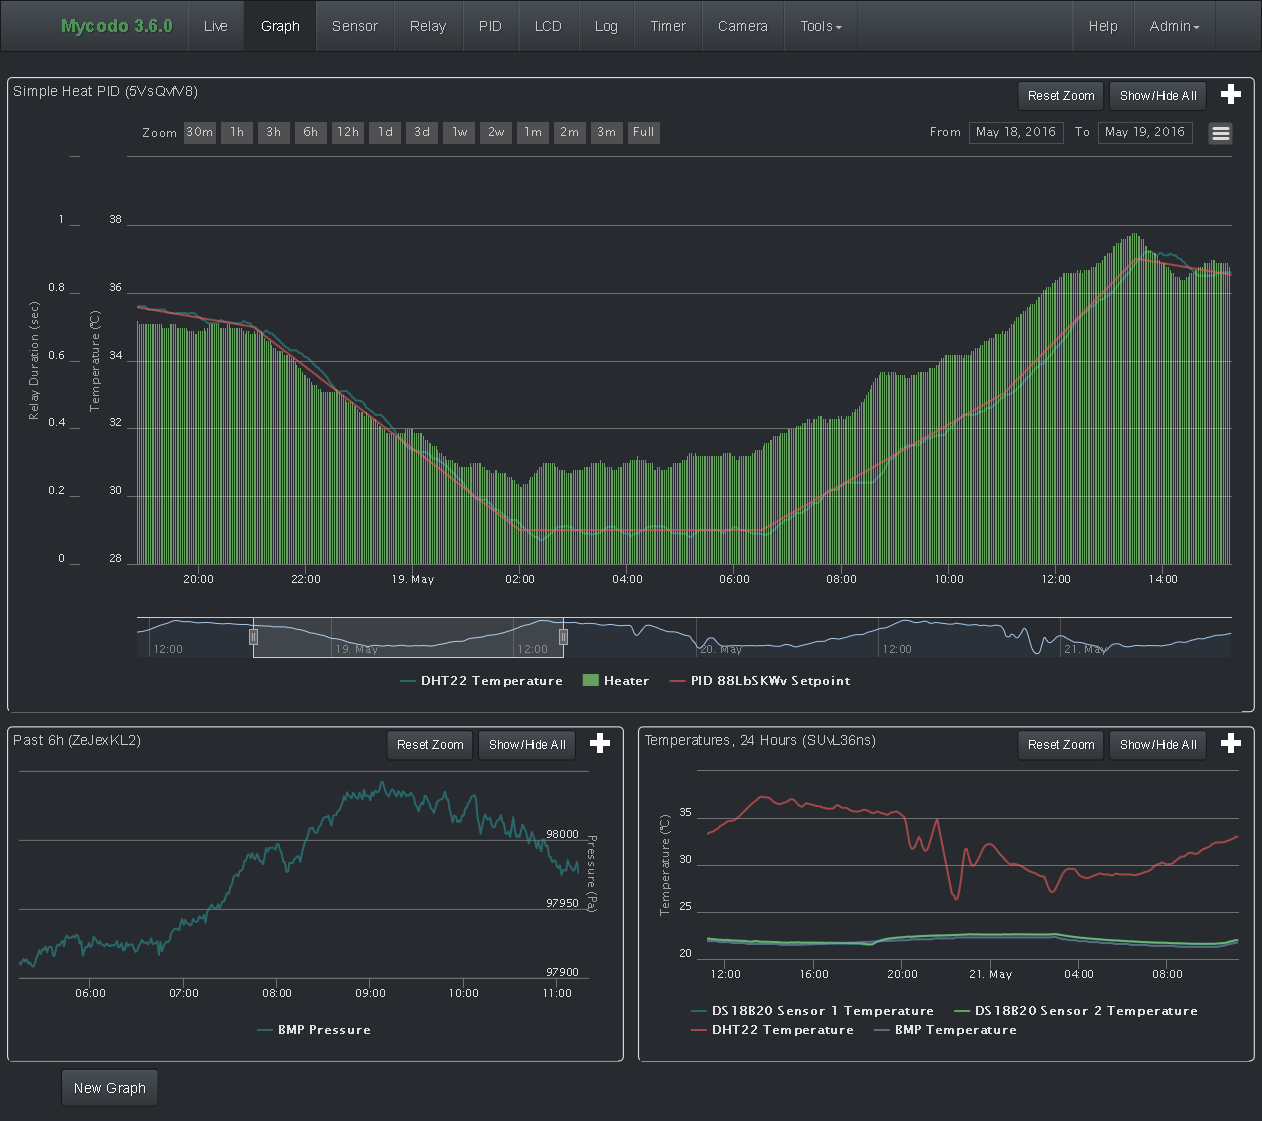
The top graph visualizes the regulation of temperature. The red line is the desired temperature (setpoint) that has been configured to change over the course of each day. The blue line is the actual recorded temperature. The green vertical bars represent how long a heater has been activated for every 20-second period. This regulation was achieved with minimal tuning, and already displays a very minimal deviation from the setpoint (±0.5° Celsius). Further tuning would reduce this variability further.
See the PID Controller and PID Tuning sections of the manual for more information.


