3DDFA
The pytorch improved re-implementation of TPAMI 2017 paper: Face Alignment in Full Pose Range: A 3D Total Solution.
This repo holds the pytorch improved re-implementation of paper Face Alignment in Full Pose Range: A 3D Total Solution. Several additional works are added in this repo, including real-time training, training strategy and so on. Therefore, this repo is far more than re-implementation. One related blog will be published for some important technique details in future. As far, this repo releases the pre-trained first-stage pytorch models of MobileNet-V1 structure, the training dataset and code. And the inference time is about 0.27ms per image (input batch with 128 iamges) on GeForce GTX TITAN X.

These repo will keep being updated, thus any meaningful issues and PR are welcomed.
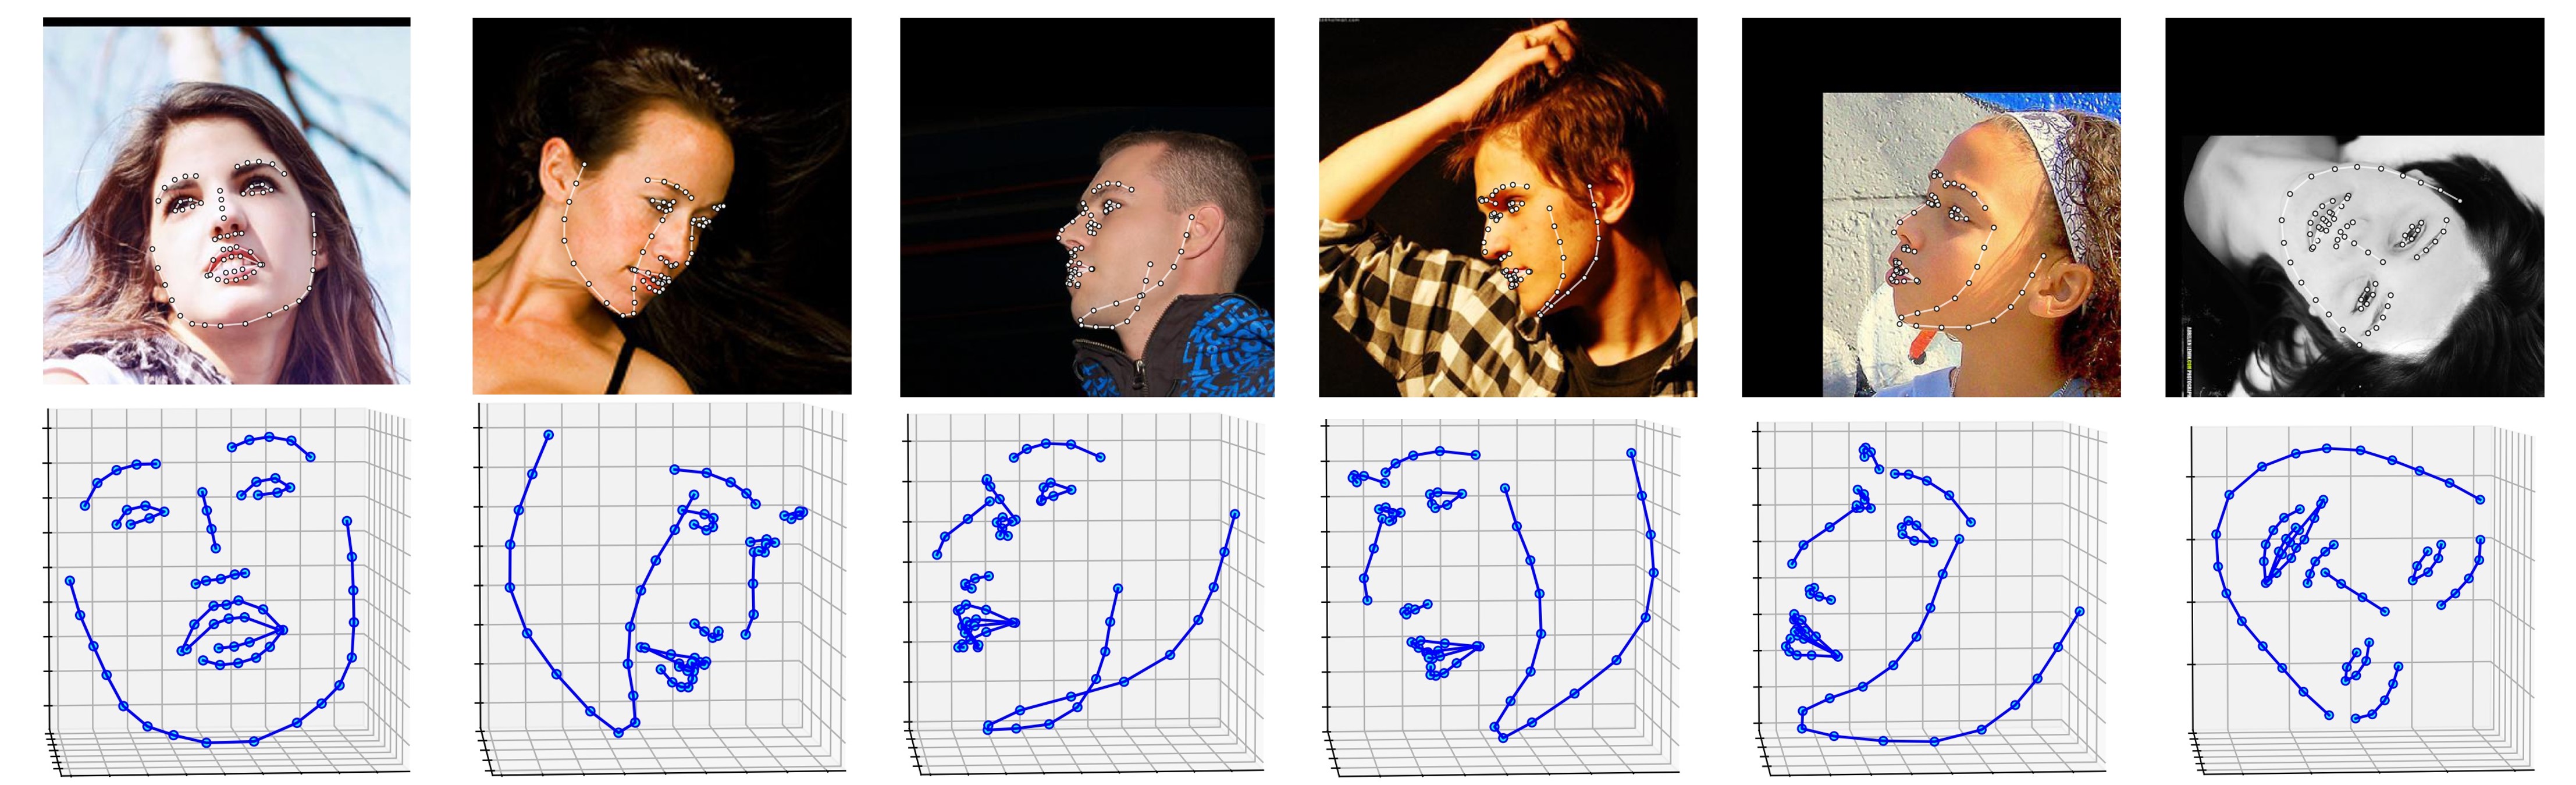
Several results on ALFW-2000 dataset (inferenced from model phase1_wpdc_vdc.pth.tar) are shown below.
Applications
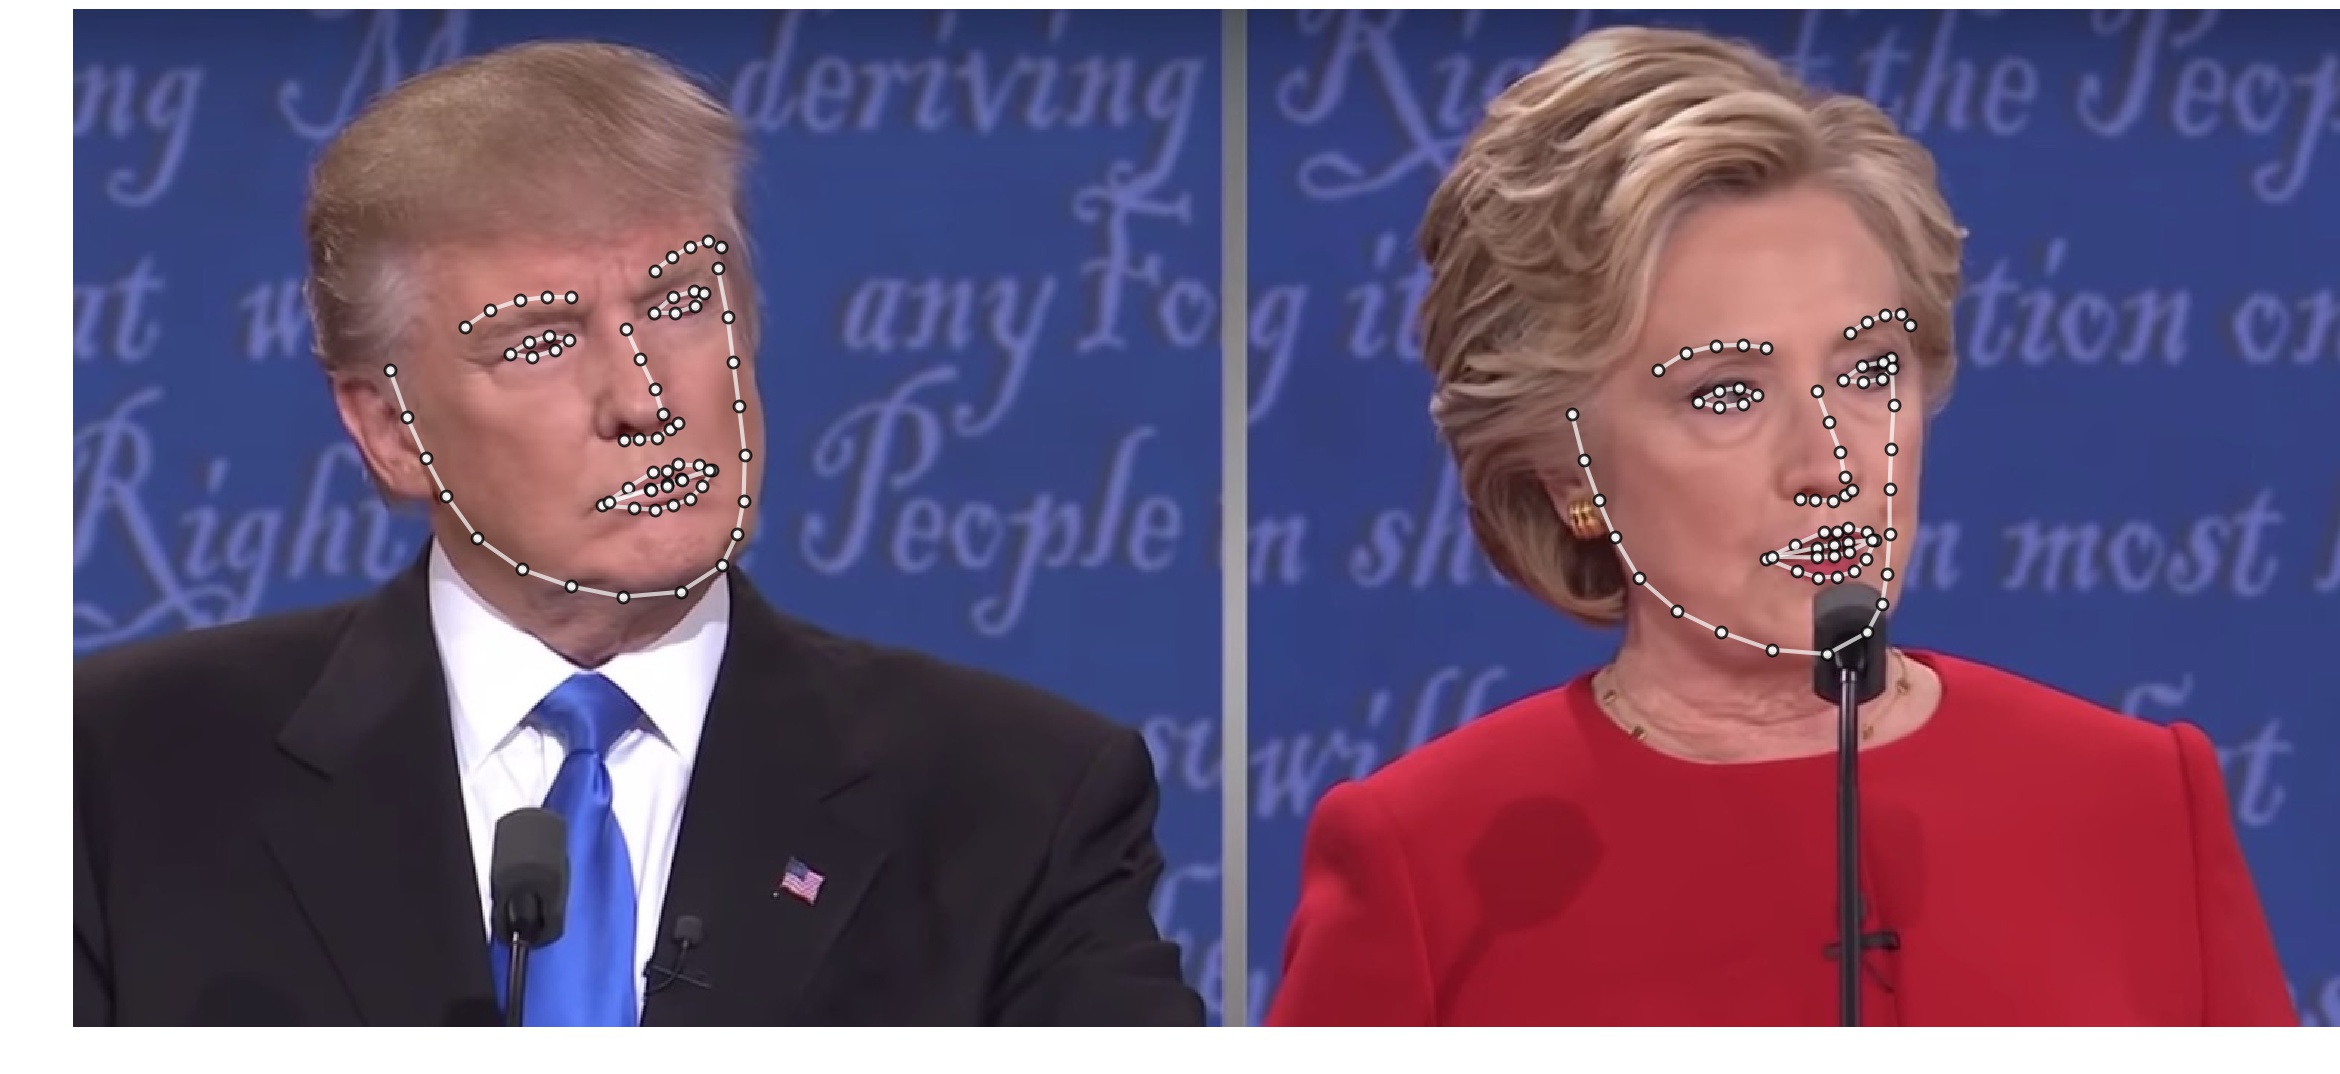
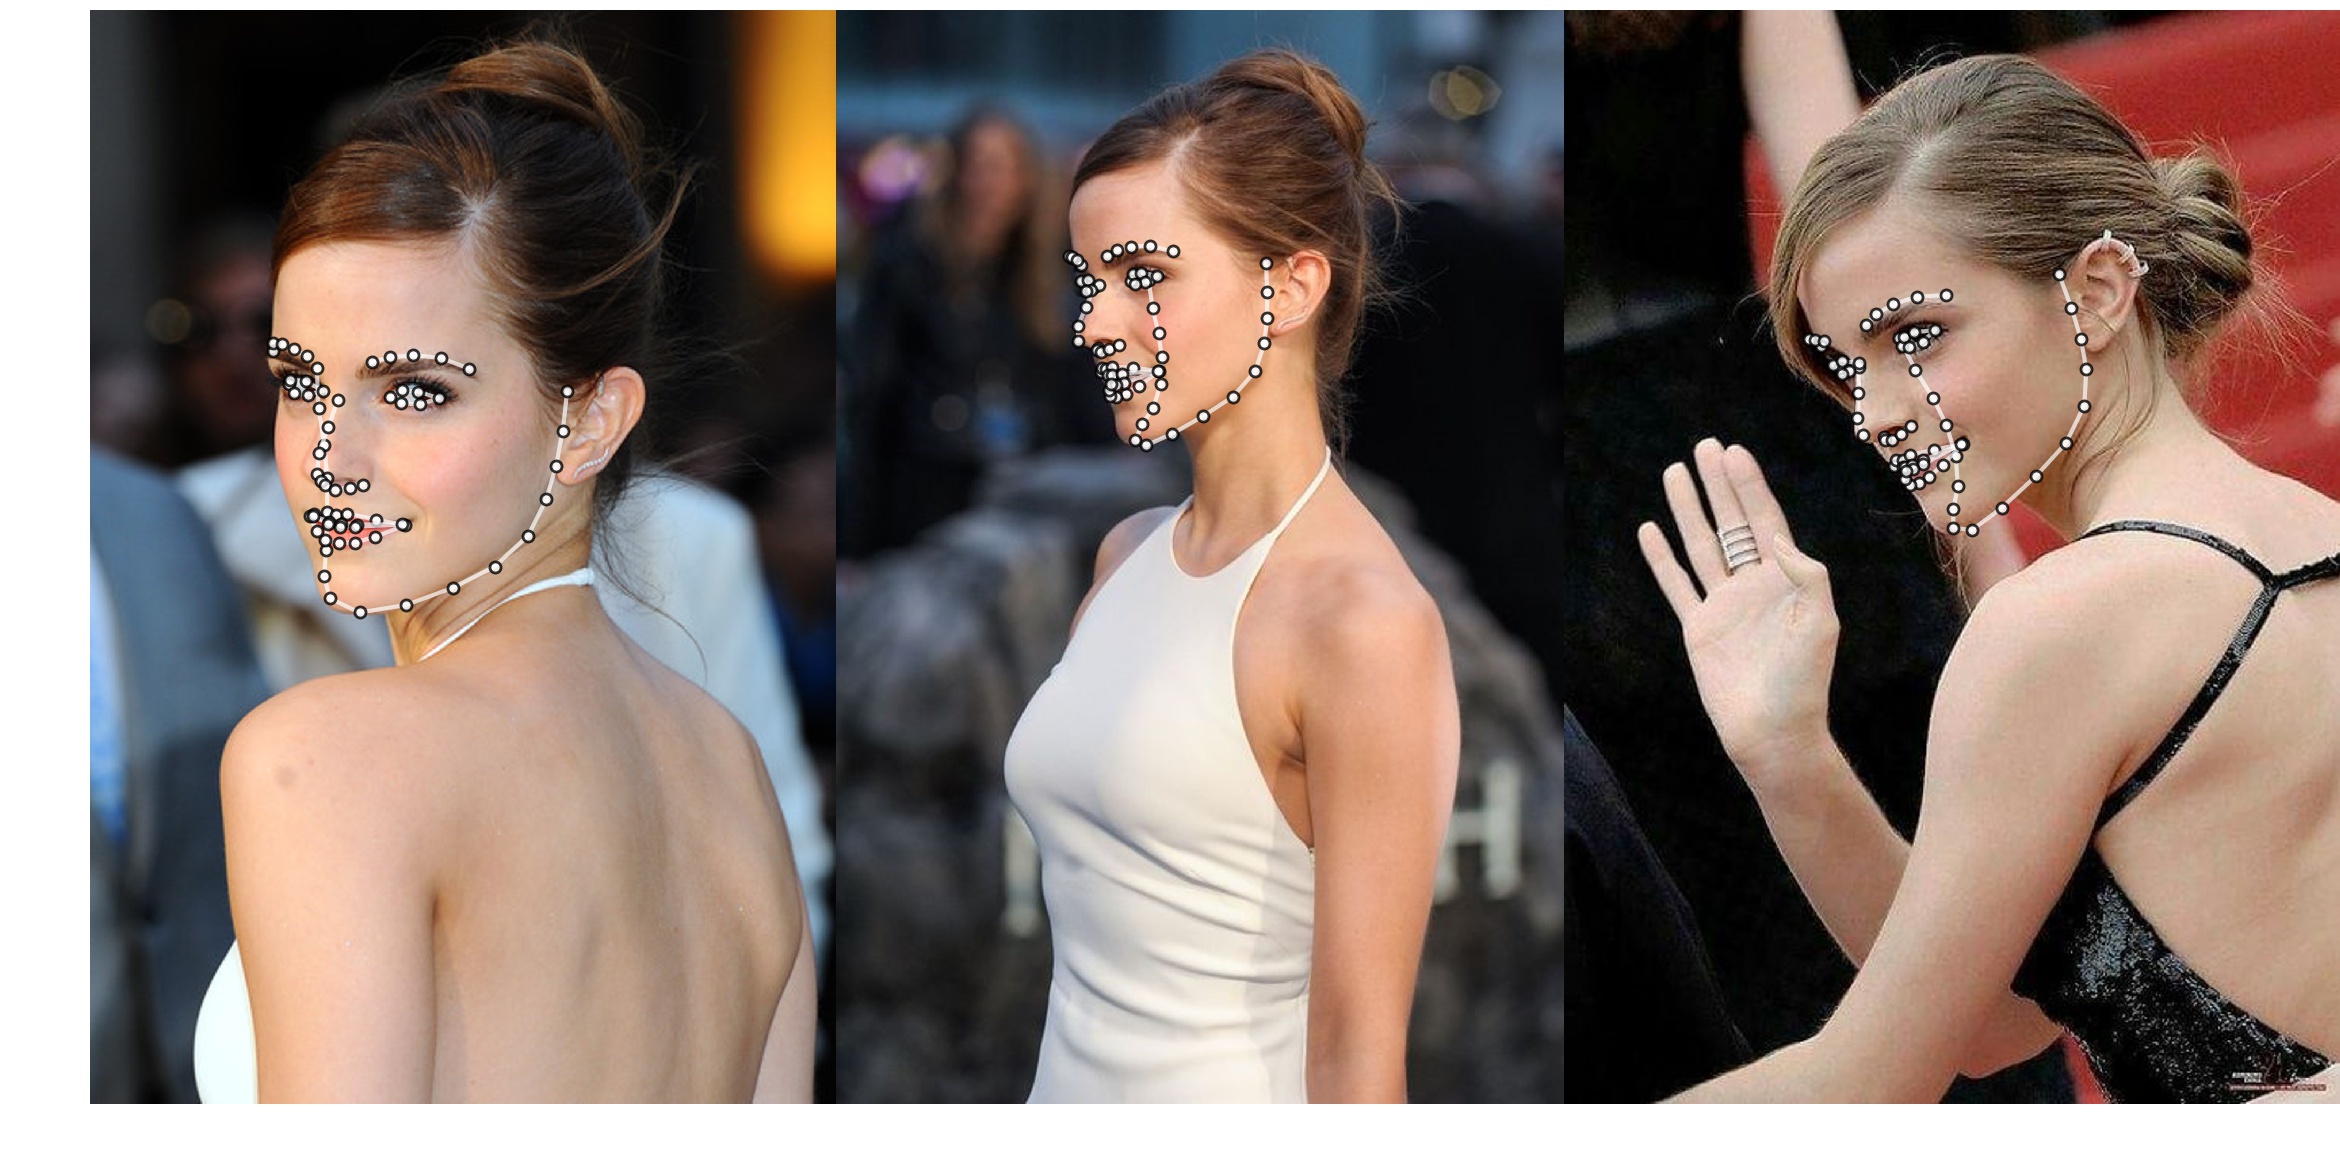
Face Alignment
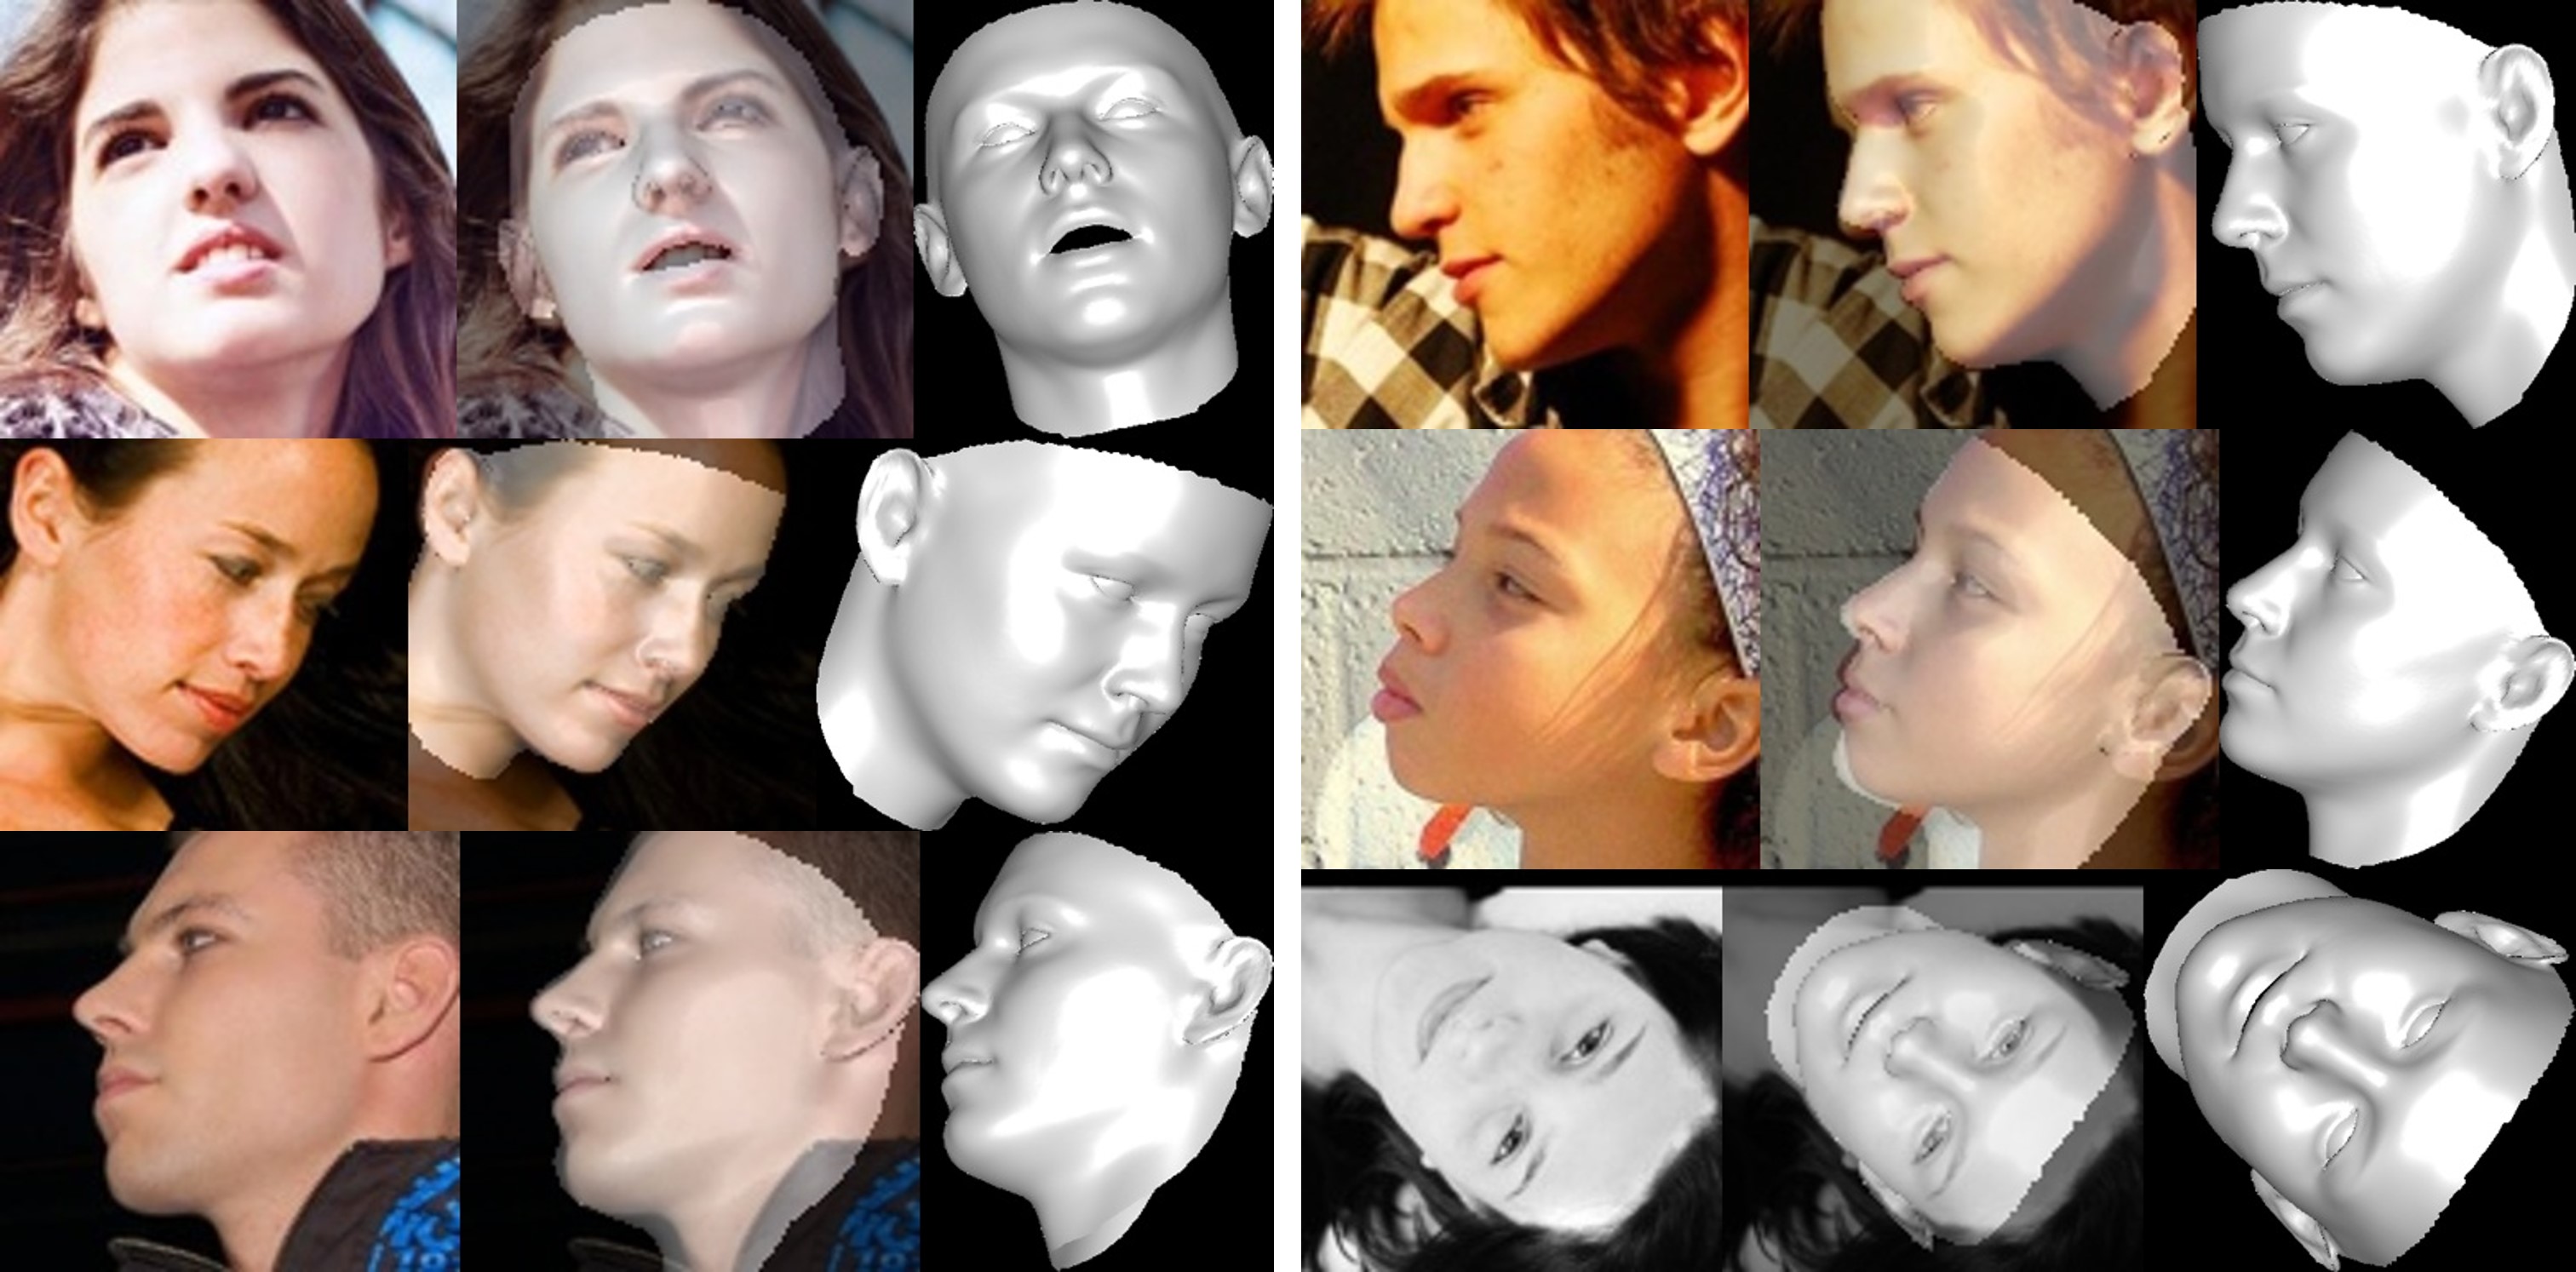
Face Reconstruction
Getting started
Requirements
- PyTorch >= 0.4.1
- Python >= 3.6 (Numpy, Scipy, Matplotlib)
- Dlib (Dlib is used for detecting face and landmarks. There is no need to use Dlib if you can provide face bouding bbox and landmarks. Optionally, you can use the two-step inference strategy without initialized landmarks.)
- OpenCV (Python version, for image IO opertations.)
# installation structions
sudo pip3 install torch torchvision # for cpu version. more option to see https://pytorch.org
sudo pip3 install numpy scipy matplotlib
sudo pip3 install dlib==19.5.0 # 19.15+ version may cause conflict with pytorch, this may take several minutes
sudo pip3 install opencv-python
In addition, I strongly recommend using Python3.6+ instead of older version for its better design.
Usage
-
Clone this repo (this may take some time as it is a little big)
git clone https://github.com/cleardusk/3DDFA.git # or [email protected]:cleardusk/3DDFA.git cd 3DDFA -
Run the
main.pywith arbitrary image as inputpython3 main.py -f samples/test1.jpgIf you can see these output log in terminal, you run it successfully.
Dump tp samples/test1_0.ply
Dump tp samples/test1_0.mat
Save 68 3d landmarks to samples/test1_0.txt
Dump tp samples/test1_1.ply
Dump tp samples/test1_1.mat
Save 68 3d landmarks to samples/test1_1.txt
Save visualization result to samples/test1_3DDFA.jpg
Because
test1.jpghas two faces, there are twomat(stores dense face vertices, can be rendered by Matlab, see visualize) andplyfiles (can be rendered by Meshlab or Microsoft 3D Builder) predicted.Please run
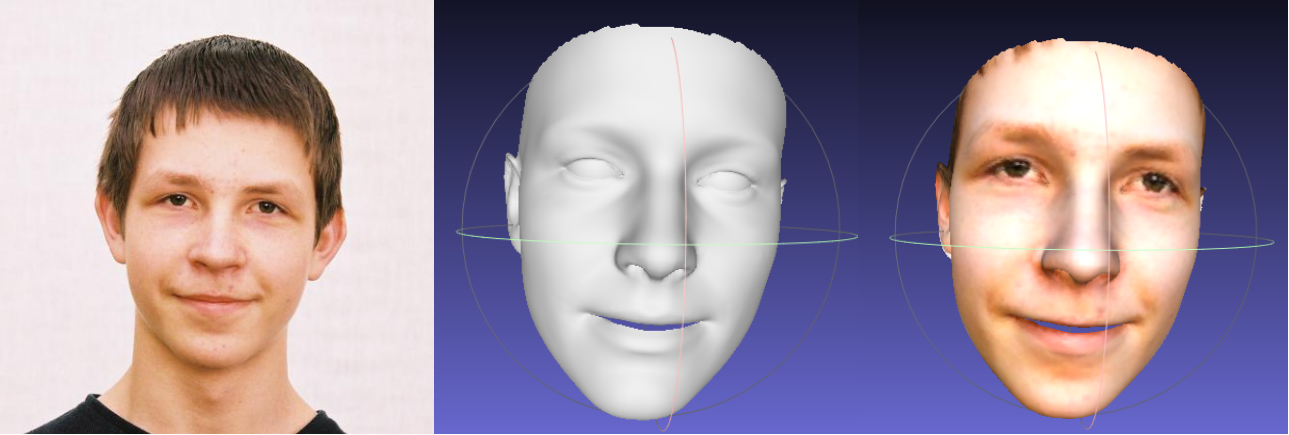
python3 main.py -hor review the code for more details.The result
samples/test1_3DDFA.jpgis shown below
-
Additional example
python3 ./main.py -f samples/emma_input.jpg --box_init=two --dlib_bbox=false
Citation
@article{zhu2017face,
  title={Face Alignment in Full Pose Range: A 3D Total Solution},
  author={Zhu, Xiangyu and Lei, Zhen and Li, Stan Z and others},
  journal={IEEE Transactions on Pattern Analysis and Machine Intelligence},
  year={2017},
  publisher={IEEE}
}

@misc{3ddfa_cleardusk,
  author =       {Jianzhu Guo, Xiangyu Zhu and Zhen Lei},
  title =        {3DDFA},
  howpublished = {\url{https://github.com/cleardusk/3DDFA}},
  year =         {2018}
}
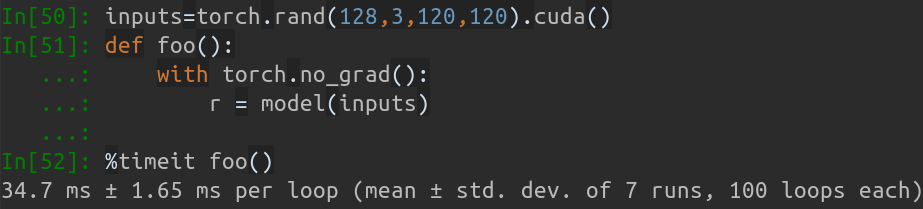
Inference speed
When batch size is 128, the inference time of MobileNet-V1 takes about 34.7ms. The average speed is about 0.27ms/pic.
Evaluation
First, you should download the cropped testset ALFW and ALFW-2000-3D in test.data.zip, then unzip it and put it in the root directory.
Next, run the benchmark code by providing trained model path.
I have already provided four pre-trained models in models directory. These models are trained using different loss in the first stage. The model size is about 13M due to the high efficiency of MobileNet-V1 structure.
python3 ./benchmark.py -c models/phase1_wpdc_vdc.pth.tar
The performances of pre-trained models are shown below. In the first stage, the effectiveness of different loss is in order: WPDC > VDC > PDC. While the strategy using VDC to finetune WPDC achieves the best result.
| Model | AFLW (21 pts) | AFLW 2000-3D (68 pts) |
|---|---|---|
| phase1_pdc.pth.tar | 6.956±0.981 | 5.644±1.323 |
| phase1_vdc.pth.tar | 6.717±0.924 | 5.030±1.044 |
| phase1_wpdc.pth.tar | 6.348±0.929 | 4.759±0.996 |
| phase1_wpdc_vdc.pth.tar | 5.401±0.754 | 4.252±0.976 |
| phase1_wpdc_vdc_v2.pth.tar [newly add] | 5.298±0.776 | 4.090±0.964 |
Training
The training scripts lie in training directory. The related resources are in below table.
| Data | Link | Description |
|---|---|---|
| train.configs | BaiduYun or Google Drive, 217M | The directory contraining 3DMM params and filelists of training dataset |
| train_aug_120x120.zip | BaiduYun or Google Drive, 2.15G | The cropped images of augmentation training dataset |
| test.data.zip | BaiduYun or Google Drive, 151M | The cropped images of AFLW and ALFW-2000-3D testset |
After preparing the training dataset and configuration files, go into training directory and run the bash scripts to train.
The training parameters are all presented in bash scripts.


