Realtime-Action-Recognition
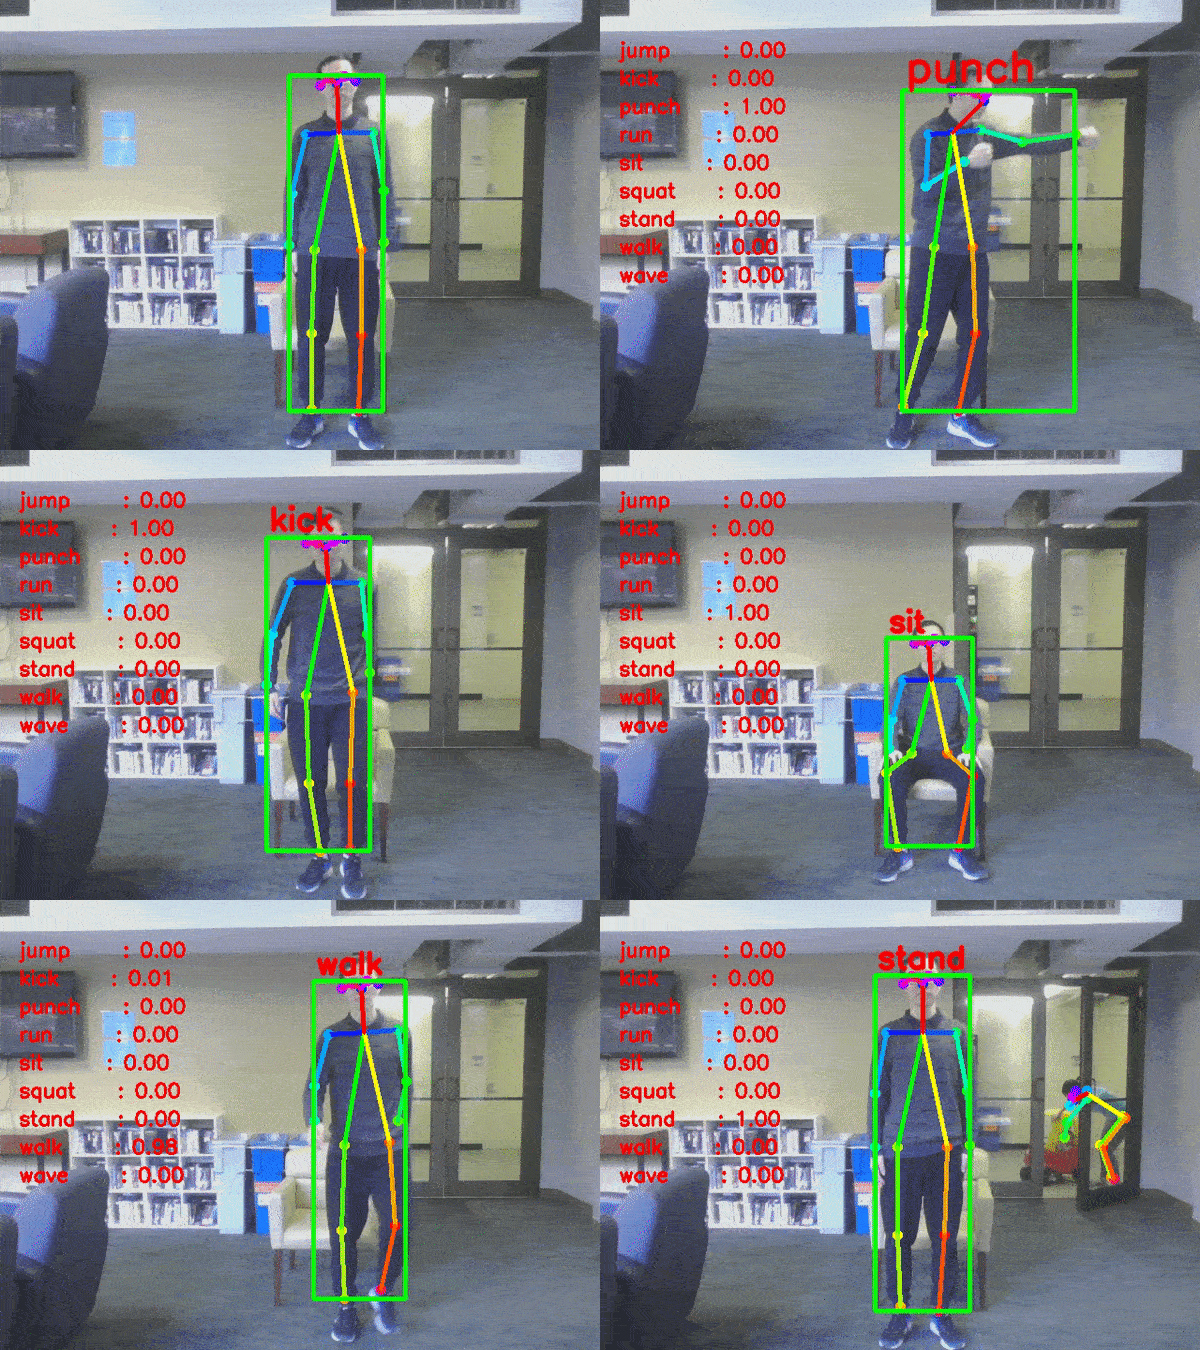
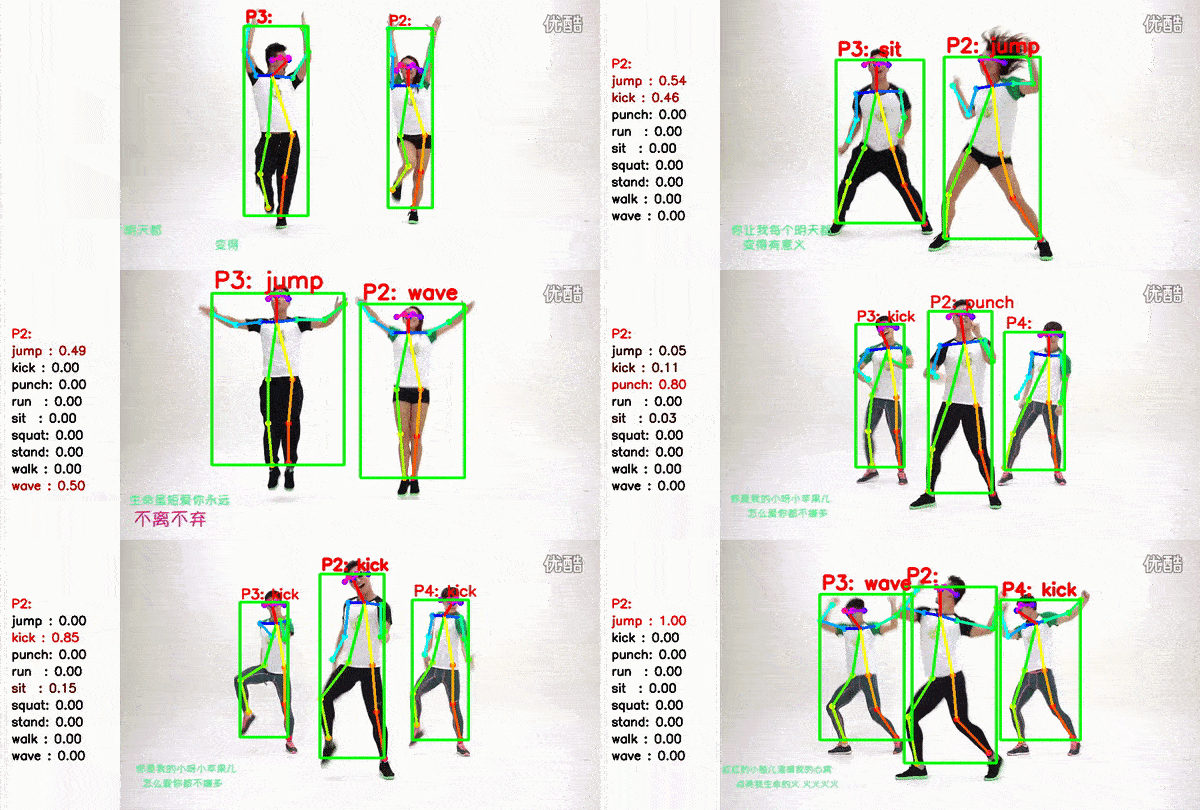
Multi-person real-time recognition (classification) of 9 actions based on human skeleton from OpenPose and a 0.5-second window.
This is my final project for EECS-433 Pattern Recognition. It's based on this github, where Chenge and Zhicheng and me worked out a simpler version.
Highlights: 9 actions; multiple people (<=5); Real-time and multi-frame based recognition algorithm.
1. Overview
1.1 Demo


1.2 Performance
I've tested this in a public place.
The recognition worked well for me. However, the performance became bad for (1) people who have different body shape, (2) people are far from the camera. How to improve? I guess the first thing to do is to collect larger training set from different people. Then, improve the data augmentation and featuer selection.
Besides, my simple tracking algorithm is not good when too many people (>10) appear in the scene. So I guess you can only use this project for course demo, but not for any useful applications ... T.T
Warning: The input video must be around 10 frames per second, since I'm using a 0.5s-window to extract features. On my GTX 1070, the program runs at 8 fps (with a proper image size), and the recognition works fine.
1.3 Training Data
9 Types of actions: wave, stand, punch, kick, squat, sit, walk, run, jump.
The total video lengths are about 20 mins, containing more than 10000 video frames recorded at 10 frames per second.
1.4 Algorithm
- Get the joints' positions by OpenPose.
- Track each person. The distance metric is based on joints positions.
See class Tracker in funcs.py - Fill in a person's missing joints by these joints' relative pos in previous frame. See class FeatureGenerator in feature_proc.py. So does the following.
- Add noise to the (x, y) joint positions to augment data.
- Use a window size of 0.5s (5 frames) to extract features.
- Extract features of (1) body velocity and (2) normalized joint positions and (3) joint velocities.
- Apply PCA to reduce feature dimension to 80. Classify by DNN of 3 layers of 50x50x50 (or switching to other classifiers in one line). See class ClassifierOfflineTrain in action_classifier.py
- Mean filtering the prediction scores between 2 frames. Add label above the person if the score is larger than 0.8. See class ClassifierOnlineTest in action_classifier.py
For more details about how the features are extracted, please see my report. For other parts of the algorithm, they are not included in this old report (I might update them someday).
2. Install Dependency (OpenPose)
I used the OpenPose from this Github: tf-pose-estimation. First download it:
export MyRoot=$PWD
cd src/githubs
git clone https://github.com/ildoonet/tf-pose-estimation
Follow its tutorial here to download the "cmu" model. As for the "mobilenet_thin", it's already inside the folder.
'''
$ cd tf-pose-estimation/models/graph/cmu
$ bash download.sh
'''
Then install dependencies. I listed my installation steps as bellow:
conda create -n tf tensorflow-gpu
conda activate tf

cd $MyRoot
pip install -r requirements1.txt
conda install jupyter tqdm
sudo apt install swig

pip install "git+https://github.com/philferriere/cocoapi.git#egg=pycocotools&subdirectory=PythonAPI"

cd $MyRoot/src/githubs/tf-pose-estimation/tf_pose/pafprocess
swig -python -c++ pafprocess.i && python3 setup.py build_ext --inplace
Make sure you can successfully run its demo examples:
cd $MyRoot/src/githubs/tf-pose-estimation
python run.py --model=mobilenet_thin --resize=432x368 --image=./images/p1.jpg
3. How to run: Testing
-
1). Test on webcam
$ python src/run_detector.py --source webcam
-
2). Test video frames from a folder
$ python src/run_detector.py --source folder
But before running, you need to modify the folder path in "def set_source_images_from_folder()" in src/run_detector.py.
4. How to run: Training
1). First, detect skeleton from training images and save result to txt:
$ python src/run_detector.py --source txtscript
- Input: Images are from "data/source_images3/". See this file for downloading.
- Output:
(1) Skeleton positions of each image in "src/skeleton_data/skeletons5/" in txt format.
(2) Images with drawn skeleton, saved in "src/skeleton_data/skeletons5_images/".
2). Second, put skeleton from multiple txt into a single txt file:
$ python src/scripts/skeletons_info_generator.py
- Input: "src/skeleton_data/skeletons5/".
- Output: "src/skeleton_data/skeletons5_info.txt"
3). Third, open jupyter notebook, and run this file: "src/Train.ipynb".
The trained model will be saved to "model/trained_classifier.pickle".
Now, it's ready to run the real-time demo from your web camera.


