ASCII Magic
Python package that converts images into ASCII art for terminals and HTML. Thanks to Colorama it's compatible with the Windows terminal. Code based on ProfOak's Ascii Py.
Instalation
pip install ascii_magic
Basic usage
import ascii_magic
output = ascii_magic.from_image_file('images/moon.jpg')
ascii_magic.to_terminal(output)
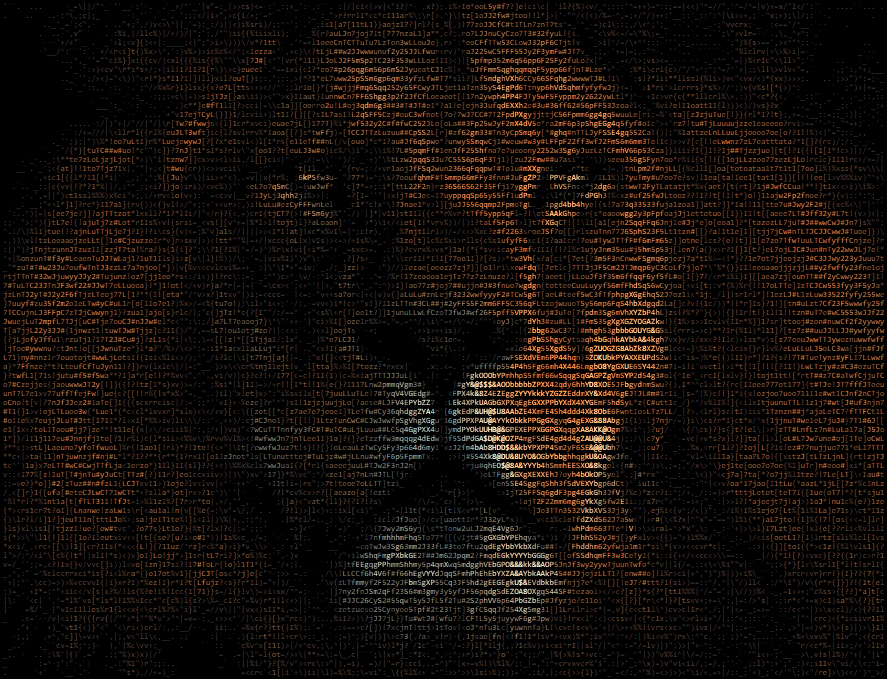
Result:
Available functions
from_image_file()
Converts an image file into ASCII art.
ascii_magic.from_image_file(
    path: str,
    columns: int = 120,
    width_ratio: float = 2.2,
    char: str = None,
    back: Back = None,
    mode: Modes = Modes.TERMINAL,
) -> str
path: a PIL-compatible file, such as a jpeg or pngcolumns (optional): the number of characters per row, more columns = wider artwidth_ratio (optional): ASCII characters are not squares, so this adjusts the width to height ratiochar (optional): instead of using many different ASCII glyphs, you can use a single one, such as '#'back (optional): In terminal mode, sets the background color with one of:ascii_magic.Back.BLACKascii_magic.Back.REDascii_magic.Back.GREENascii_magic.Back.YELLOWascii_magic.Back.BLUEascii_magic.Back.MAGENTAascii_magic.Back.CYANascii_magic.Back.WHITE
mode (optional): one of:ascii_magic.Modes.TERMINAL: outputs ASCII with terminal color codes (8 tones)ascii_magic.Modes.ASCII: outputs pure ASCII with no color codes, resulting in a "grayscale" imageascii_magic.Modes.HTML_TERMINAL: outputs HTML simulating terminal colors; wrap it in a<pre>ascii_magic.Modes.HTML: as above, but with full color
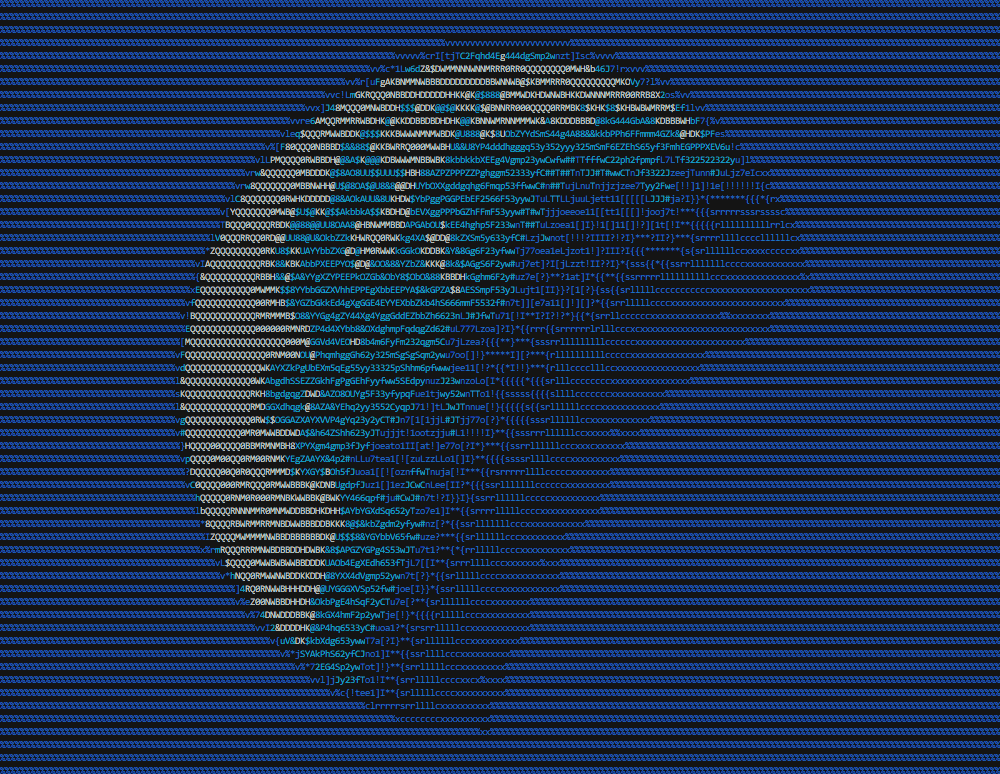
Example:
output = ascii_magic.from_image_file(
    'images/lion.jpg',
    columns=200,
    back=ascii_magic.Back.BLUE
)
Result:
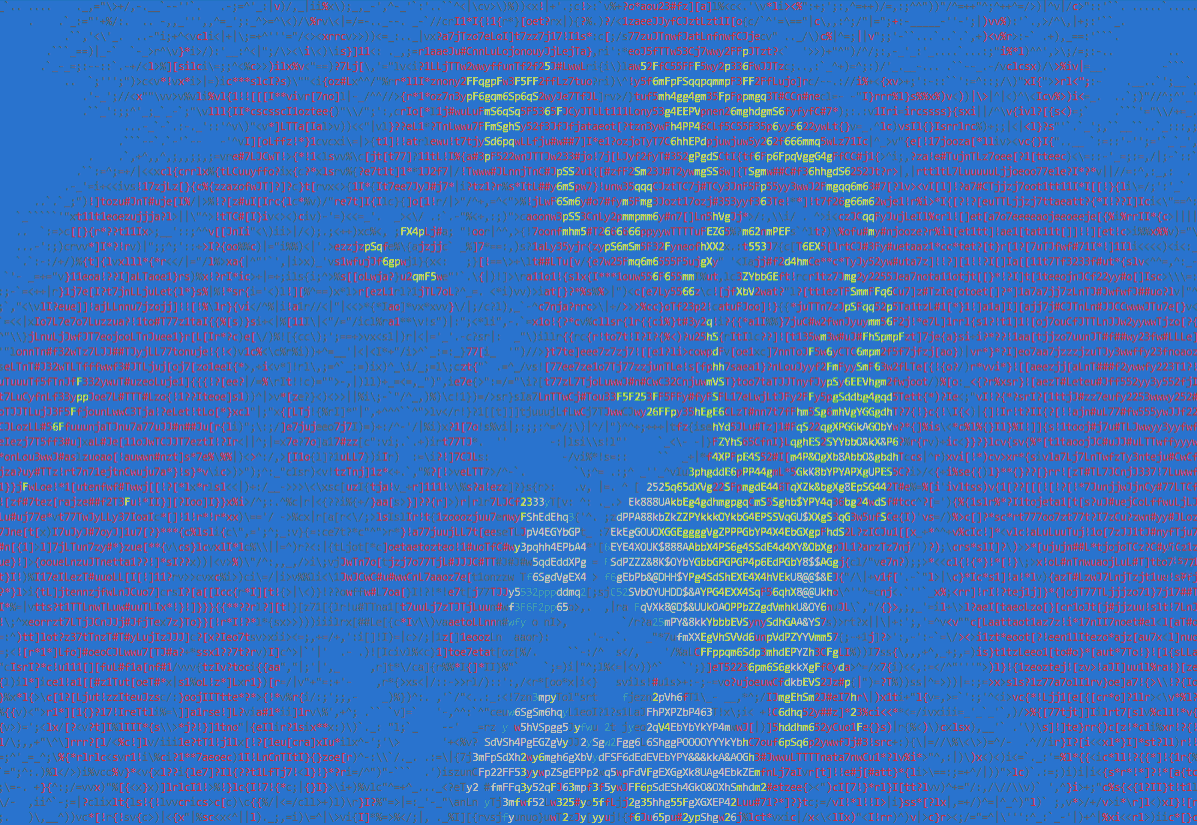
Example:
output = ascii_magic.from_image_file(
    'images/lion.jpg',
    columns=200,
    width_ratio=2,
    mode=ascii_magic.Modes.HTML
)
Result:
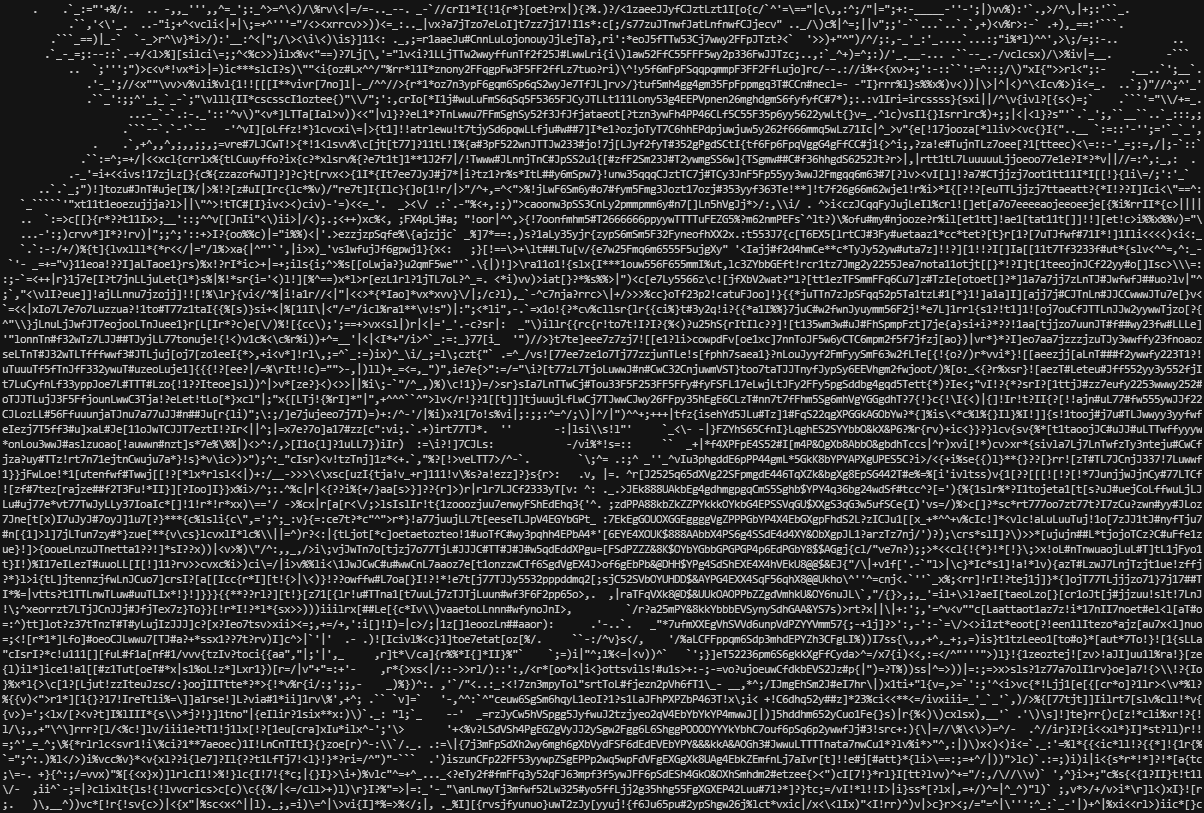
Example:
output = ascii_magic.from_image_file(
    'images/lion.jpg',
    columns=200,
    mode=ascii_magic.Modes.ASCII
)
Result:
from_url()
As above, but using the URL of an image. Raises an urllib.error.URLError if something goes wrong while requesting the image, but you can also catch it as an OSError if you don't want to import urllib to your project.
ascii_magic.from_url(
    url: str,
    # ... as above
) -> str
url: an URL which will be loaded via urllib (supports redirects)
Example:
try:
    img_url = 'https://source.unsplash.com/800x600?nature'
    output = ascii_magic.from_url(img_url, columns=100)
except OSError as e:
    print(f'Could not load the image, server said: {e.code} {e.msg}')
from_clipboard()
As above, but with the contents of the clipboard. Raises a OSError if the clipboard doesn't contain an image.
Requires PyGObject under Linux.
ascii_magic.from_clipboard(
    # ... as above
) -> str
Example:
try:
    output = ascii_magic.from_clipboard(columns=100)
except OSError:
    print('The clipboard does not contain an image')
from_image()
As above, but using an image loaded with Pillow.
ascii_magic.from_image(
    img: Image,
    # ... as above
) -> str
img: PIL image object
Example:
from PIL import Image
with Image.open('images/lion.jpg') as img:
    output = ascii_magic.from_image(img, columns=100)
init_terminal()
Initializes Colorama, which is required on Windows for displaying art in terminal mode. It's the same as doing colorama.init().
ascii_magic.init_terminal() -> None
to_terminal()
Initializes Colorama, which is required on Windows for displaying art in terminal mode, and prints the input. It's the same as doing colorama.init() and then print().
ascii_magic.to_terminal(input: str) -> None
to_html_file()
Writes the input to a barebones HTML file inside a <pre>.
ascii_magic.to_html(
    path: str,
    input: str,
    styles: str = '...', # See description
    additional_styles: str = '',
    auto_open: bool = False
) -> None
path: The relative path and filename of the HTML fileinput: The markup which will be includedstyles (optional): A string with a bunch of CSS styles for the<pre>element, by default:- display: inline-block;
- border-width: 4px 6px;
- border-color: black;
- border-style: solid;
- background-color: black;
- font-size: 8px;
additional_styles (optional): You can add your own styles without removing the default onesauto_open (optional): If True,webbrowser.open()will be called on the HTML file
example:
output = ascii_magic.from_image_file('images/lion.jpg', mode=ascii_magic.Modes.HTML)
ascii_magic.to_html_file('lion.html', output, additional_styles='background: #222;')
quick_test()
Runs ascii_magic with a random Unsplash picture with the default parameters and prints it to the terminal.
ascii_magic.quick_test() -> None


