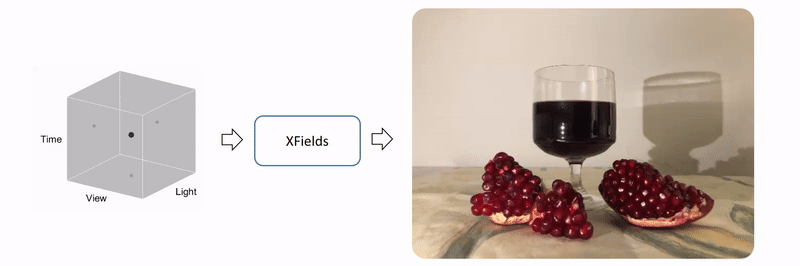
X-Fields
Implicit Neural View-, Light- and Time-Image Interpolation.
Requirements
- Python 3.7
- Tensorflow 1.14.0: Run
conda install tensorflow-gpu==1.14.0 - Tensorlayer 1.11.1: Run
pip3 install tensorlayer==1.11.1(used for bilinear upsampling) - OpenCV: Run
conda install -c menpo opencvorpip install opencv-python.
Dataset
View-Light-Time(Eight scenes: three scenes with 5x5x5 capturing and five scenes with 3x3x3 capturing)Time(One scene: orange juice scene with three frames)Light(Two scenes: eiffel scene with four frames and angel scene with five frames)View(Two scenes: splash scene and island scene with 5x5 capturing from Soft3D dataset )
Training
For the training, please run the train.py using the following input arguments:
    python train.py  --dataset    # path to dataset
                     --type       # xfields type: --type light view time
                                  #               --type view
                                  #               --type time
                                  #               --type light
                     --dim        # dimension of the input xfields: --dim r c   (for a view or light array of size r (rows) x c (columns))
                                  #                                 --dim n     (for a time seqeunce of size n)
                                  #                                 --dim l v t (for an array of l (light dimension) x v (view dimension) x t (time dimension))
                     --factor     # image downsampling factor
                     --num_n      # number of neighbors for interpolation
                     --nfg        # network capacity multiplier (can be 4, 8, or 16)
                     --sigma      # bandwidth parameter in soft blending (can be 0.1 or 0.5)
                     --br         # baseline ratio y/x (in case of 2D light or view array)
                     --savepath   # saving path
Below you can find the examples for training each xfields type (please download the dataset first):
- Example for view interpolation:
python train.py --dataset dataset/view/island --type view --dim 5 5 --factor 2 --num_n 2 --nfg 8 --sigma 0.5 --br 1 --savepath results/
- Example for time interpolation:
python train.py --dataset dataset/time/juice --type time --dim 3 --factor 6 --num_n 2 --nfg 8 --sigma 0.5 --savepath results/
- Example for light interpolation:
python train.py --dataset dataset/light/eiffel --type light --dim 1 4 --factor 6 --num_n 2 --nfg 4 --sigma 0.5 --savepath results/
- Example for view-light-time interpolation:
python train.py --dataset dataset/view_light_time/3x3x3/pomegranate --type light view time --dim 3 3 3 --factor 6 --num_n 2 --nfg 4 --sigma 0.1 --savepath results/
During the training, the interpolation result will be saved in the saved training folder so that you can monitor the training progress. You can also find the trained model in the trained model folder.
Testing
Now, in order to see the interpolation result (as a video) please run the test.py using the same input arguments plus two additional (optional) inputs:
             --scale      # number of intermediate points used for interpolation
             --fps        # output video frame rate
Below you can find the examples for testing each xfields type:
- Example for view interpolation:
python test.py --dataset dataset/view/island --type view --dim 5 5 --factor 2 --num_n 4 --nfg 8 --sigma 0.5 --br 1 --scale 90 --fps 90 --savepath results/
- Example for time interpolation:
python test.py --dataset dataset/time/juice --type time --dim 3 --factor 6 --num_n 2 --nfg 8 --sigma 0.5 --scale 90 --fps 30 --savepath results/
- Example for light interpolation:
python test.py --dataset dataset/light/eiffel --type light --dim 1 4 --factor 6 --num_n 2 --nfg 4 --sigma 0.5 --scale 30 --fps 60 --savepath results/
- Example for view-light-time interpolation:
python test.py --dataset dataset/view_light_time/3x3x3/pomegranate --type light view time --dim 3 3 3 --factor 6 --num_n 8 --nfg 4 --sigma 0.1 --scale 90 --fps 90 --savepath results/
The results will be saved in the rendered videos folder.
Details
Network
Our network is a decoder with a series of convolutional layers + bilinear upsampling operation. We do not apply any layer normalization (such as InstanceNorm or BatchNorm), but we found it necessary to add the coordconv layer. Below, you can see where and what we concatenate as the coordconv layer:

Input
The input can be 1D (for time), 2D (for light or view), or 3D coordinates (for view-light-time). The value in each axis starts from zero to total number of images along that axis minus one. For example, given an array of 3x5 light field images, the input is a 2D coordinate (s,t) with{0,1,2} and
{0,1,2,3,4} and the coordconv parameters are
m = 0 and n = 4. At the test time, you can give any continuous value between 0 to 2 for s and 0 to 4 for t.
Output
The outputs are 2xnd flows where nd depends on the dimensionality of X-Fields, e.g. nd=3 for view-light-time interpolation and nd=1 for (2D or 1D) view interpolation.
Learnt albedo
We assumed that albedo and shading are RGB (three channels), and the composition are done in the linear color space. Note that for the time and view interpolation we do not apply albedo-shading separation in our implementation.
Capturing
For 2D light and view dataset, we assumed the images are captured in a row-wise manner and for view-light-time dataset, the images are captured in this order that we first fix the light source and capture the scene at different views, then we change the light position. Once we repeated the same procedure for all the possible light positions, we then change the time and so on. For your own capturing order, you can easily modify the scripts in load_imgs.py. The code also assumes that the 2D\3D input images are captured in a regular grid.
Network capacity
The network capacity parameter nfg was set empirically in our experiments. Normally, by increasing the network capacity, you can see an improvement in the quality of the flow, but at the cost of slower runtime. For high resolution images or long video sequences (for time interpolation) or large arrays (for light, view, or view-light-time interpolation), we also recommend choosing higher values for the capacity (nfg = 8 or nfg = 16).
Training iterations
The training is done for 100k iterations and at each epoch we perform around 500 iterations. However, in each epoch we check the averaged L1 loss and if it is below a certain threshold, we terminate the training. You can alter this threshold by changing the value of stop_l1_thr in the train.py.
Number of neighbors
At the training time, we usually use only two neighbors for interpolation; however, at the test time, we include more neighbors to produce more consistent results.
Sigma value
We also observed that the value we set for the bandwidth parameter sigma could affect the quality of the interpolation. We typically set it to 0.1; however, increasing it to 0.5 or 1.0 in some cases (e.g. the orange liquid sequence) improved the result.
Training loss
We used L1 loss in our training, and we did not observe any further improvement by applying different losses such as SSIM or perceptual loss.
Citation
@article{Bemana2020xfields,
    author	= {Mojtaba Bemana, Karol Myszkowski, Hans-Peter Seidel, Tobias Ritschel},
    title	= {X-Fields: Implicit Neural View-, Light- and Time-Image Interpolation},
    journal	= {ACM Transactions on Graphics (Proc. SIGGRAPH Asia 2020)},
    year	= {2020},
    volume = {39},
    number = {6},
    doi = {10.1145/3414685.3417827}
    }


