Suricata Language Server
Suricata Language Server is an implementation of the Language Server Protocol for Suricata signatures.
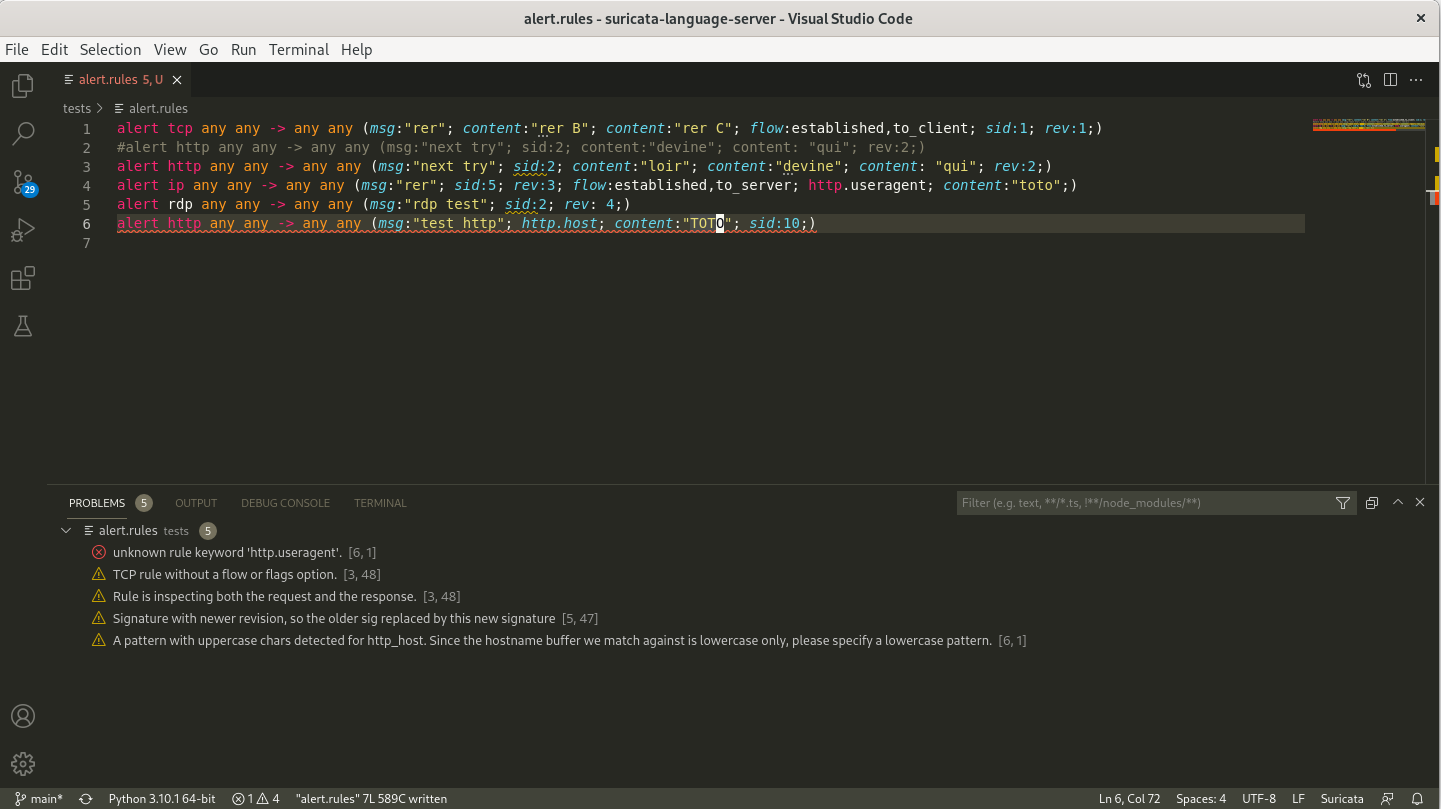
It adds syntax check and hints as well as auto-completion to your preferred editor once it is configured.
Suricata Language Server requires Python and a Suricata binary.
The code is based on Chris Hansen’s fortran language server and
incorporate code from Stamus Networks’ scirius.
Installation
You can use pip to install the Suricata language server
pip install suricata-language-server
Run this command with sudo if you want to install it globally.
Manual Installation
After cloning the repository, you need to install first the server by running in the root directory of the project
pip install .
This will add a suricata-language-server command to the system that will be invoked
transparently by the editors that are configured to use it. You can use sudo pip install .
to install it system wide if needed.
Server options
See suricata-language-server -h for complete and up-to-date help.
- –suricata-binary: path to the suricata binary used for signatures testing
- –max-lines: don’t run suricata tests if file is bigger then this limit (auto-completion only)
Editors Configuration
Neovim

One simple way tis to use nvim-lspconfig and add the following
snippet to your configuration
local lspconfig = require 'lspconfig'
local configs = require 'lspconfig.configs'
-- Check if the config is already defined (useful when reloading this file)
if not configs.suricata_language_server then
  configs.suricata_language_server = {
    default_config = {
      cmd = {'suricata-language-server'};
      filetypes = {'suricata', 'hog'};
      root_dir = function(fname)
        return lspconfig.util.find_git_ancestor(fname)
      end;
      single_file_support = true;
      settings = {};
    };
  }
end
If you want to setup a custom suricata binary, you can use the following trick:
local suricata_ls_cmd = {'suricata-language-server', '--suricata-binary=/my/own/suricata'}
require'lspconfig'.suricata_language_server.setup{
  cmd = suricata_ls_cmd,
  on_attach = on_attach,
}
Visual Studio code
Download the Suricata IntelliSense extension (suricata-ls-x.x.x.vsix) published by Stamus Networks
from the marketplace and install it into your Visual Studio Code instance.
Then you can configure it via the settings. Main settings are the path to the Suricata Language
Server binary and the path to the Suricata binary.
Sublime Text 3
You can use the LSP Package to provide support for LSP to Sublime Text 3.
To acticate Suricata Language Server on .rules file, you need to create a new syntax for Suricata file by using the content of Suricata Sublime syntax from justjamesnow
To do so you can click on Tools > Developer > New Syntax then paste the content of the file and modify the text text.suricata to source.suricata. This will provide syntax highlighting as well as a source.suricata Sublime selector that can be used to trigger the Suricata Language Server activation.
To do that, you can setup the Suricata Language Server by following the documentation for the LSP package on client configuration. You will need to open Preferences > Package Settings > LSP > Settings and edit the configuration to add the Suricata Language Server.
The following configuration is known to work
{
  "clients": {
    "suricatals": {
      "enabled": true,
      "command": ["/path/to/suricata-language-server", "--suricata-binary=/path/to/suricata"],
      "selector": "source.suricata",
    },
  },
}


