Text-Classification-Using-LSTM
Ontology Classification-Using-LSTM

Introduction
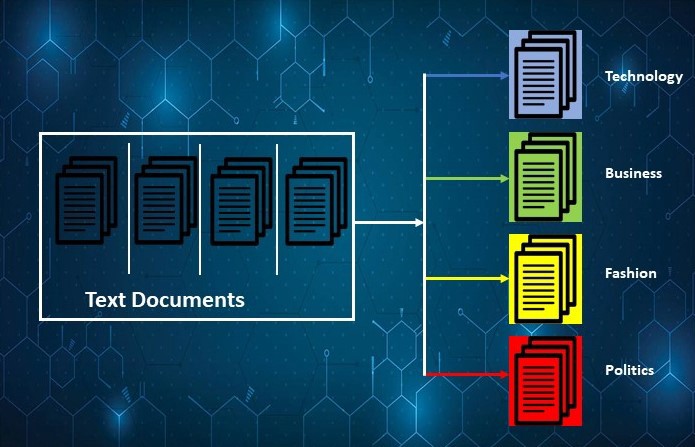
Text classification is the task of assigning a set of predefined categories to free text. Text classifiers can be used to organize, structure, and categorize pretty much anything. For example, new articles can be organized by topics, support tickets can be organized by urgency, chat conversations can be organized by language, brand mentions can be organized by sentiment, and so on.
Technologies Used
1. IDE - Pycharm
2. LSTM - As a classification Deep learning Model
3. GPU - P-4000
4. Google Colab - Text Analysis
5. Flas- Fast API
6. Postman - API Tester
7. Gensim - Word2Vec embeddings
? Prerequisites
All the dependencies and required libraries are included in the file requirements.txt
Python 3.6
Dataset
The DBpedia ontology classification dataset is constructed by picking 14 non-overlapping classes from DBpedia 2014. They are listed in classes.txt. From each of thse 14 ontology classes, we randomly choose 40,000 training samples and 5,000 testing samples. Therefore, the total size of the training dataset is 560,000 and testing dataset 70,000. The files train.csv and test.csv contain all the training samples as comma-sparated values. There are 3 columns in them, corresponding to class index (1 to 14), title and content. The title and content are escaped using double quotes (“), and any internal double quote is escaped by 2 double quotes (“”). There are no new lines in title or content.
For Dataset Please click here
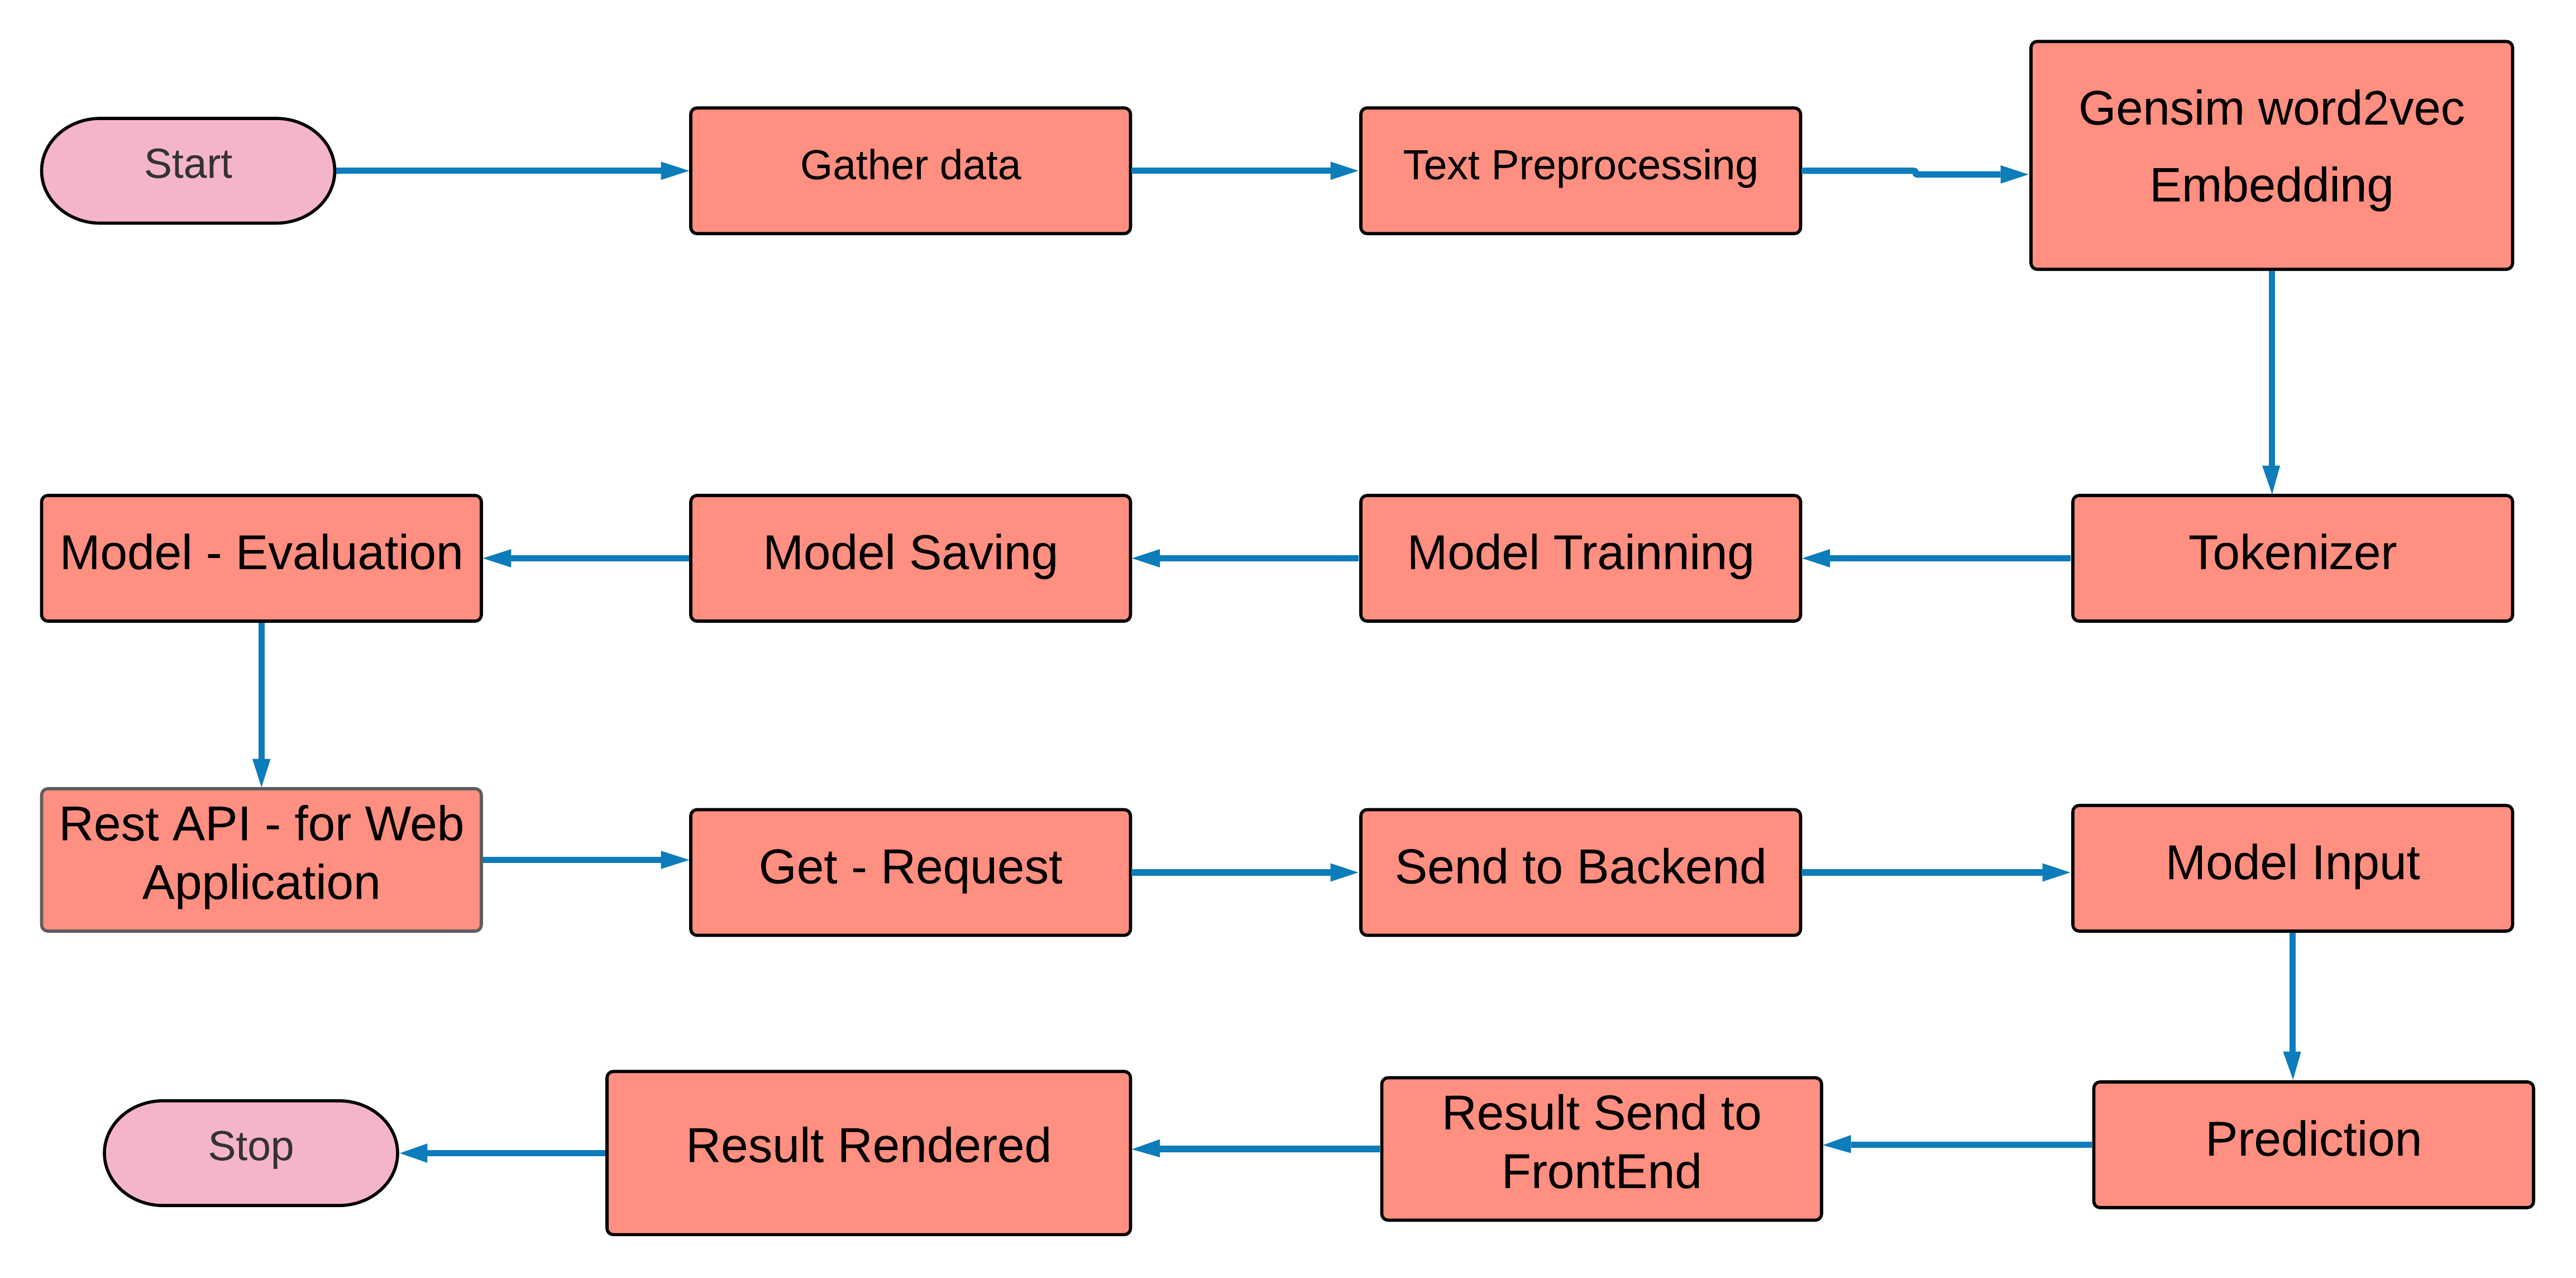
Process – Flow of This project
? Installation of Text-Classification-Using-LSTM
- Clone the repo
git clone https://github.com/KrishArul26/Text-Classification-DBpedia-ontology-classes-Using-LSTM.git
- Change your directory to the cloned repo
cd Text-Classification-DBpedia-ontology-classes-Using-LSTM
- Create a Python 3.6 version of virtual environment name ‘lstm’ and activate it
pip install virtualenv

virtualenv bert

lstm\Scripts\activate
- Now, run the following command in your Terminal/Command Prompt to install the libraries required!!!
pip install -r requirements.txt
? Working
Type the following command:
python app.py
After that You will see the running IP adress just copy and paste into you browser and import or upload your speech then closk the predict button.
Implementations
In this section, contains the project directory, explanation of each python file presents in the directory.
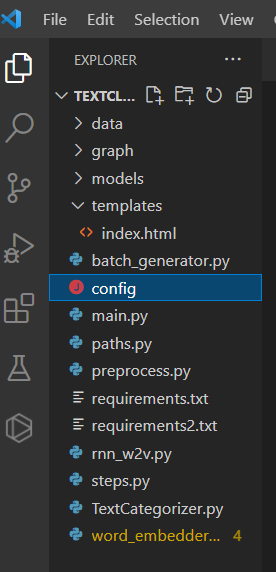
1. Project Directory
Below picture illustrate the complete folder structure of this project.
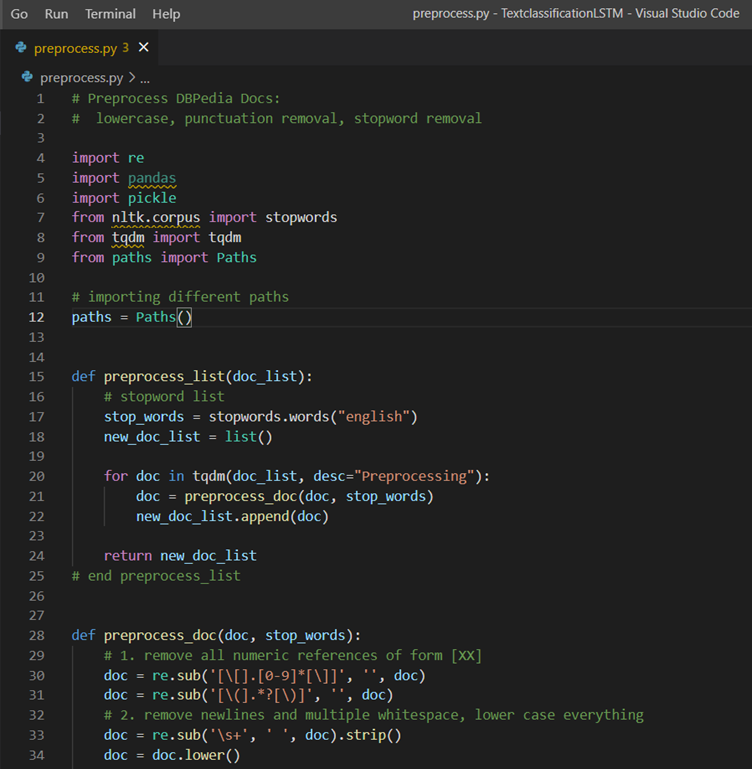
2. preprocess.py
Below picture illustrate the preprocess.py file, It does the necessary text cleaning process such as removing punctuation, numbers, lemmatization. And it will create train_preprocessed, validation_preprocessed and test_preprocessed pickle files for the further analysis.
3. word_embedder_gensim.py
Below picture illustrate the word_embedder_gensim.py, After done with text pre-processing, this file will take those cleaned text as input and will be creating the Word2vec embedding for each word.

4. rnn_w2v.py
Below picture illustrate the rnn_w2v.py, After done with creating Word2vec for each word then those vectors will use as input for creating the LSTM model and Train the LSTM (RNN) model with body and Classes.

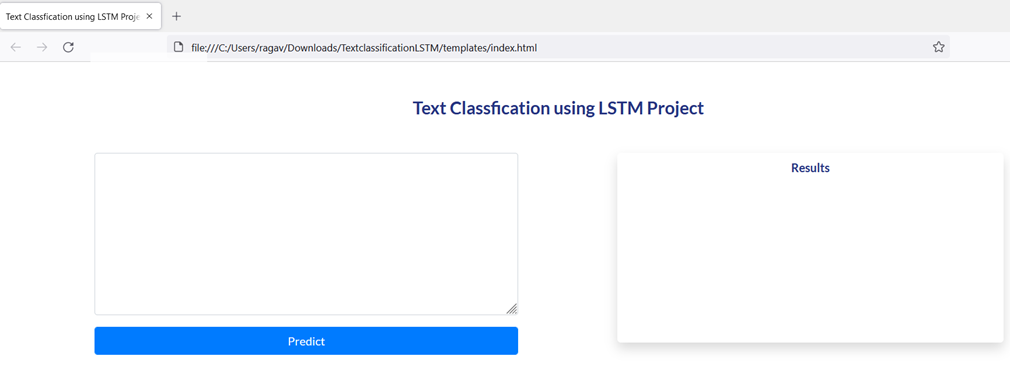
5. index.htmml
Below picture illustrate the index.html file, these files use to create the web frame for us.

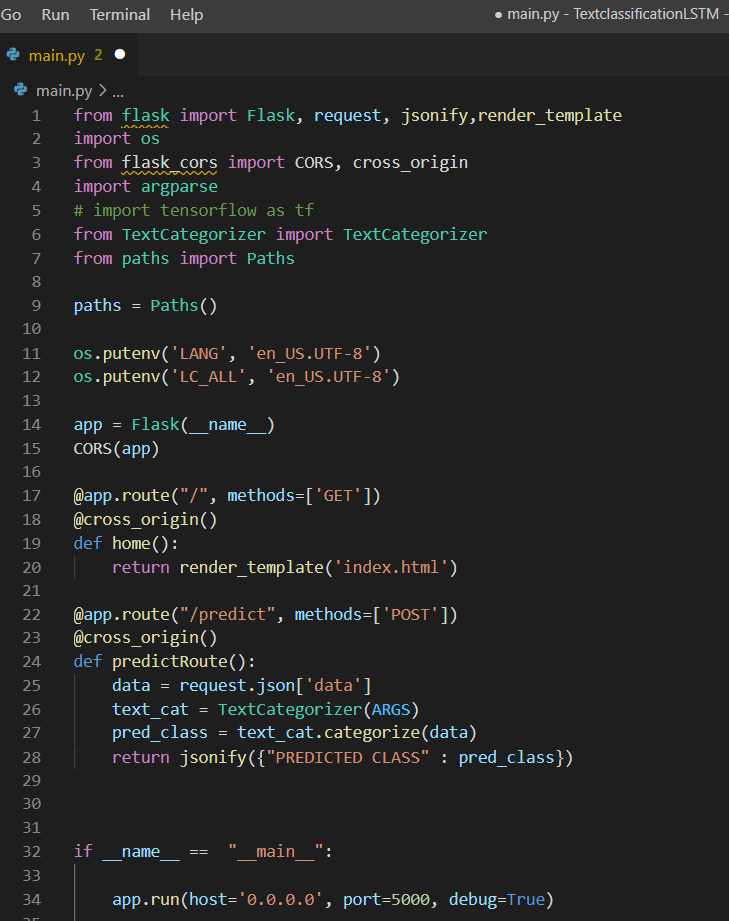
6. main.py
Below picture illustrate the main.py, After evaluating the LSTM model, This files will create the Rest -API, To that It will use FLASK frameworks and get the request from the customer or client then It will Post into the prediction files and Answer will be deliver over the web browser.
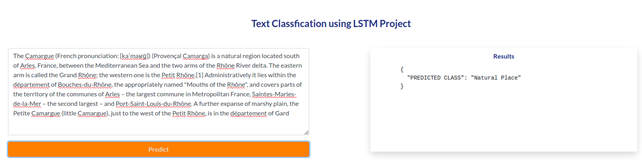
7. Testing Rest-API