3d-bat
3D Bounding Box Annotation Tool (3D-BAT) Point cloud and Image Labeling.
Paper
Reference: https://arxiv.org/abs/1905.00525
3D Bounding Box Labelling Instructions
- Watch raw video (10 sec) to get familiar with the sequence and to see where interpolation makes sense
- Watch tutorial videos to get familiar with (translation/scaling/rotating objects, interpolation and how to use helper views)
- Start WhatPulse. Login with [email protected] and password: labeluser
- Draw bounding box in the Bird's-Eye-View (BEV)
- Move/Scale it in BEV using 3D arrows (drag and drop) or sliders
- Choose one of the 5 classes (Car, Pedestrian, Cyclist, Motorbike, Truck)
- Interpolate if necessary
- Select Object to interpolate by clicking on a Bounding Box
- Activate 'Interpolation Mode' in the menu (checkbox) -> start position will be saved
- Move to desired frame by skipping x frames
- Translate object to new position
- Click on the 'Interpolate' button in the menu
- Repeat steps 4-7 for all objects in the sequence
- Download labels to your computer (JSON file)
- Stop the time after labeling is done.
- Make screenshots of keyboard and mouse heat map, record number of clicks and keystrokes
Keyboard Shortcuts
| Key | Description | |
|---|---|---|
 |
Toggle view (3D view/Bird's-Eye-View) | |
 |
Move forward in 3D view (TODO) | |
 |
Move left in 3D view (TODO) | |
 |
Move backward in 3D view (TODO) | |
 |
Move right in 3D view (TODO) | |
 |
Move down in 3D view (TODO) | |
 |
Move up in 3D view (TODO) | |
|
Enlarge camera image | |
 |
Next frame | |
 |
Previous frame | |
 |
Interpolate | |
  |
Snap to grid in 0.5m steps (floor alignment mode) | |
 |
Enable/Disable Translation mode | |
|
Move selected object forward (TODO) | |
|
Move selected object to left (TODO) | |
|
Move selected object backward (TODO) | |
|
Move selected object to right (TODO) | |
|
Move selected object down (TODO) | |
|
Move selected object up (TODO) | |
 |
Enable/Disable Rotation mode | |
 |
Rotate selected object counter-clock-wise (TODO) | |
 |
Rotate selected object clock-wise (TODO) | |
 |
Enable/Disable Scaling mode | |
 |
Increase length along longitudinal axis (y-axis) (TODO) | |
 |
Decrease length along longitudinal axis (y-axis) (TODO) | |
|
Decrease width along lateral axis (x-axis) (TODO) | |
|
Increase width along lateral axis (x-axis) (TODO) | |
 |
Increase height along vertical axis (z-axis) (TODO) | |
|
Decrease height along vertical axis (z-axis) (TODO) | |
 |
Increase arrow size | |
 |
Decrease arrow size | |
 |
Show/Hide X-axis | |
|
Show/Hide Y-axis | |
 |
Show/Hide Z-axis (only in 3D mode) | |
 |
Switch between different operation modes (translate, rotate, scale) (TODO) | |
 |
Select next object (TODO) | |
 OR OR  |
Delete selected object (TODO) | |
 |
Marking mode (TODO) | |
|
Move orientation of object counter-clock-wise (TODO) | |
|
Move orientation of object clock-wise (TODO) | |
 |
Select class CAR (TODO) | |
 |
Select class Truck (TODO) | |
 |
Select class Motorcycle (TODO) | |
 |
Select class Bicycle (TODO) | |
 |
Select class Pedestrian (TODO) | |
|
On a 2D/3D object: Show bounding box | |
| On a camera image: Enlarge/Shrink camera image (TODO) | ||
| On ego vehicle: Show field-of-view (TODO) | ||
| : Switch FOV to next channel |
||
|
Reset all selected bounding boxes (TODO) | |
 |
Full Screen Mode | |
|
Play video (TODO) | |
 |
Keyboard navigation (only in 3D view) (TODO) | |
 |
Toggle Lighting (TODO) | |
|
Label random color (TODO) | |
|
Label class color (TODO) | |
|
Show/Hide trajectory (TODO) | |
|
Save current screen into file (requires request to server) (TODO) | |
|
Download annotation file (TODO) | |
|
Undo operation (TODO) | |
|
Redo operation (TODO) | |
|
Close tab (exit) | |
 |
Show/Hide grid (TODO) | |
 |
Toggle aggregated pointcloud (TODO) | |
 |
Hide all labels except selected object (Press again to show all labels) (TODO) | |
 |
Show keyboard shortcuts | |
 |
Unselect box (TODO) | |
| Quit fullscreen cam image (TODO) | ||
 |
Copy bounding box (by dragging) (TODO) |
Hints:
- Select
Copy label to next framecheckbox if you want to keep the label (position, size, class) for next frame - Use helper views to align object along z-axis (no need to switch into 3D view)
- Label one object from start to end (using interpolation) and then continue with next object
- Do not apply more than one box to a single object.
- Check every cuboid in every frame, to make sure all points are inside the cuboid and look reasonable in the image view.
- The program has been quite stable in my use cases, but there is no guarantee that it won't crash. So please back up (download) your annotated scenes (~every 10 min). Saving to local storage (browser) is done automatically.
- Download the annotation file into the following folder:
3d-bat/input/<DATASET>/<SEQUENCE>/annotations - Please open new issue tickets on Github for questions and bug reports or write me an email ([email protected]). Thanks!
Special Rules
- Minimum LIDAR Points :
- Label any target object containing at least 10 LIDAR points, as long as you can be reasonably sure you know the location and shape of the object. Use your best judgment on correct cuboid position, sizing, and heading.
- Cuboid Sizing :
- Cuboids must be very tight. Draw the cuboid as close as possible to the edge of the object without excluding any LIDAR points. There should be almost no visible space between the cuboid border and the closest point on the object.
- Extremities :
- If an object has extremities (eg. arms and legs of pedestrians), then the bounding box should include the extremities.
- Exception: Do not include vehicle side view mirrors. Also, do not include other vehicle extremities (crane arms etc.) that are above 1.5 meters high.
- Carried Object :
- If a pedestrian is carrying an object (bag, umbrella, tools etc.), such objects will be included in the bounding box for the pedestrian. If two or more pedestrians are carrying the same object, the bounding box of only one of them will include the object.
- Use Images when Necessary:
- For objects with few LIDAR points, use the images to make sure boxes are correctly sized. If you see that a cuboid is too short in the image view, adjust it to cover the entire object based on the image view.
Labels
For every bounding box, include one of the following labels:
-
Car: Vehicle designed primarily for personal use, e.g. sedans, hatch-backs, wagons, vans, mini-vans, SUVs, jeeps and pickup trucks (a pickup truck is a light duty truck with an enclosed cab and an open or closed cargo area; a pickup truck can be intended primarily for hauling cargo or for personal use).
-
Truck: Vehicles primarily designed to haul cargo including lorrys, trucks.
-
Motorcycle: Gasoline or electric powered 2-wheeled vehicle designed to move rapidly (at the speed of standard cars) on the road surface. This category includes all motorcycles, vespas and scooters. It also includes light 3-wheel vehicles, often with a light plastic roof and open on the sides, that tend to be common in Asia (rickshaws). If there is a rider and/or passenger, include them in the box.
-
Bicycle: Human or electric powered 2-wheeled vehicle designed to travel at lower speeds either on road surface, sidewalks or bicycle paths. If there is a rider and/or passenger, include them in the box.
-
Pedestrian: An adult/child pedestrian moving around the cityscape. Mannequins should also be annotated as
Pedestrian.
Detailed Instructions and Examples
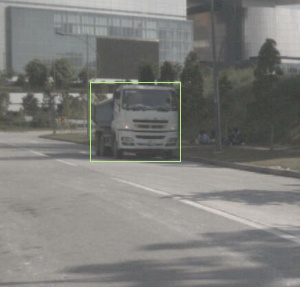
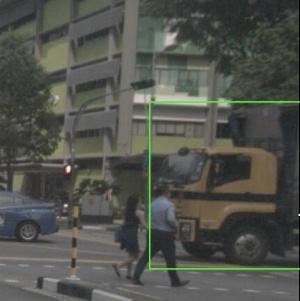
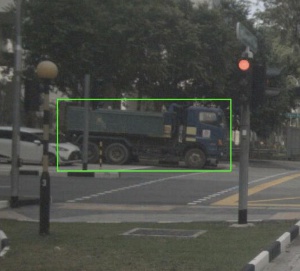
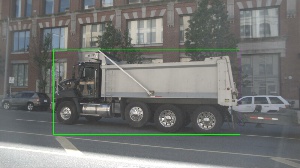
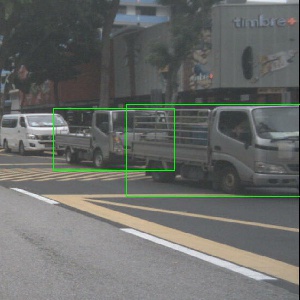
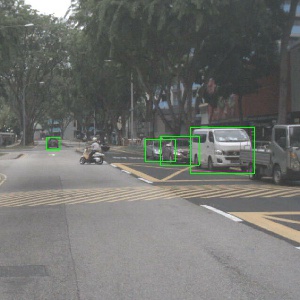
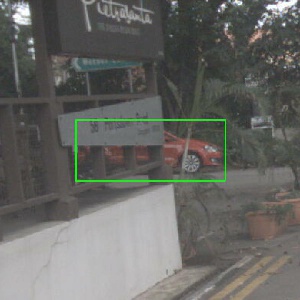
Bounding Box color convention in example images:
- Green: Objects like this should be annotated
Car
-
Vehicle designed primarily for personal use, e.g. sedans, hatch-backs, wagons, vans, mini-vans, SUVs and jeeps.
- If it is primarily designed to haul cargo it is a truck.
Truck
-
Vehicles primarily designed to haul cargo including lorrys, trucks, pickup truck (a pickup truck is a light duty truck with an enclosed cab and an open or closed cargo area; a pickup truck can be intended primarily for hauling cargo or for personal use).